Showing posts with label Stovetop. Show all posts

Thursday, May 11, 2017

Enchiladas Verdes

I had a bunch of left over roast turkey from another recipe I was making for a friend so I decided to try my hand at enchiladas verdes!

Here is the recipe I came up with after reading through several recipes I found on the internet (as mentioned previously on this blog, I tend to Frankenstein recipes together to get the exact recipe I want -- or I just make one up myself!)
 
Sauce:
  • 3 cups tomatillos remove husk, rinse, cut them in half or quarters
  • 2 TBS minced garlic
  • 1” slice of onion optional (or you can remove before blending if someone doesn’t like onions)
  • Water or soup stock enough to just cover the tomatillos (I use either stock from the meat or Better Than Bouillon)
  • 3-5 serrano peppers discard stems, seeds, and pith (the amount you use depends on pepper size and how spicy you want it)
Throw the first four ingredients into a saucepan. Cook until the tomatillos dull and become somewhat translucent. Add the serranos and blend. Cook a couple minutes more and remove from heat or turn the heat to warm if you will be serving right away.

Filling:
  • 4 cups shredded roast meat - chicken, turkey, or pork
  • 3-4 TBS olive oil
  • 3 TBS minced garlic
  • 3-4 bay leaves
  • 1 cup water or soup stock  (I use the stock from the meat, or Better Than Bouillon)
  • 1 TBS chipotle pepper ground
  • I use 3-4 TBS of Badia fajita seasoning, but you can add your own spices. Try this mix:
                1-2 tsp red pepper flakes (depending on how hot you want it)
                1 tsp paprika (can use smoked)
                1/4 tsp cayenne pepper (leave out if you don't want it very spicy)
                2 tsp chili pepper powder
                1/2 tsp cumin
                1/2 tsp onion powder or 1 tsp onion flakes
                1/2 tsp garlic powder or 1 tsp granulated garlic
                1 tsp salt
                *Add more of any of these spices until the meat tastes the way that you want it to!
                  You can add a variety of peppers (eg. poblano/ancho) for a richer flavor.

Add meat to a large, hot skillet. Stir until heated. Add oil. Once oil is heated, add garlic and seasoning (except bay leaves). Cook for a couple minutes stirring to keep from burning. Add stock and bay leaves. Turn down heat to a simmer. Add more water if needed. Simmer on low for 10-15 minutes to set in the flavors.

Assembly:
  • White corn tortillas
  • Filling
  • Sauce
  • Chopped cilantro
Heat a pan (preferably cast iron) on high. Put a tortilla on the dry pan for 30 seconds, turn over and cook another 30 seconds. There should be some browning, and even a little scorching is good. They should lose some of their translucence but still be flexible. Remove from heat and throw another tortilla on. Repeat process with all the tortillas you will need.
On one end of the cooked tortilla, spread about 1/8 cup hot filling. Roll. Put on a plate and pour the heated sauce on top. Sprinkle chopped cilantro over the enchilada.
Eat!

Friday, October 21, 2011

Titania Pasta Maker

I have been putting off getting a pasta maker for years. The ones that I have found were big, bulky and expensive. And pasta is cheap, so why bother?

Well, I tried homemade noodles a couple of months ago. I have pledged to reduce my purchases of corporate products and non-corporate pasta is expensive! -- but tastes SO GOOD!! So instead of paying $6 for a bag of egg noodles, I just made them myself. My family declared that only homemade noodles would suffice from that day on.

Which is great except for the fact that they are really time consuming when you are cutting all the pasta into strips with a knife.

So a couple of weeks ago, I was in a store looking for a smaller stock pot for canning just a few jars at a time, and instead found a compact pasta maker for $35. It impressed me enough that I bought it without even researching it first. It ended up being probably the most perfect pasta maker I could have gotten.


It is Titania from Imperia. The reviews I eventually read indicated that it was an authentic Italian pasta maker - the one that an Italian household would most likely be using.The pasta is easy to make. It is just flour, eggs, a little salt, and oil. I don't even measure. The consistency should be like bread dough when it is all mixed and kneaded thoroughly.
Now a lot of the reviews complained that the maker took more than two hands to operate. I was able to work the machine without clamping it to anything and while holding the video camera under my chin. And all the while I had three dogs dancing around my feet looking for fallen pasta scraps. I think those facts illustrate the actual ease of use of this pasta maker. I did not let the dough rest. I just rolled a ball of the dough in a little flour before trying to roll it through. You do have to start on a wide setting and work your way down to a thinner setting or your dough will shred and it is much harder to get it through the rollers if you skip too many widths.
I used the noodles I made in the video in this vegetable and chicken broth soup. Celery, carrots, kohlrabi, sweet onion, sauteed with olive oil, and seasoned with a little ginger. A couple chicken bouillon cubes, water and the cooked noodles. It was delicious!

And the noodles from start to finish probably took less time to make and cook than it would have taken store-bought dried noodles to cook. With homemade noodles this fast and easy, I don't think it will be hard at all meeting my family's declaration!

Monday, October 17, 2011

Ginger Garlic Wonton Packages

I had some interesting wontons from the local food co-op and knew I had to try to make my own.

Mine were better!

  • 1 head nappa cabbage, shredded
  • 1 bulb garlic, minced or put through a press
  • 2 TBS fresh ginger, minced
  • 2 scallions, chopped - use white and green parts
  • 1/8 cup chopped carrots
  • 1 package wonton wrappers
  • 2 cups peanut oil
I threw the first five ingredients into my electric chopper to get it into a fine slaw.

Spoon into wonton wrappers.

Fold the corners to the middle like an envelope and seal together with water. I found that wetting my hands slightly before handling the wrappers helped a lot.

Fry in peanut oil on medium high heat. You want them to cook quickly but not burn.

Serve on their own as they are really flavorful, or you could serve with sweet pepper dipping sauce.

These were easy and quick to make, and DELICIOUS!!

Wednesday, May 12, 2010

Morel Cream Sauce

I had my best morel year ever. My son and I usually just saute the mushrooms and eat them as a treat, but I actually had enough to make some kind of a dish with the morels that I found. I wanted to keep it simple and mild, since this was the first time that I was actually cooking them into a dish and wanted to be sure they would hold their own.

So, although I was going to do a stroganoff or an Alfredo, I opted for a simple cream sauce. I basically went out to my garden and pulled what was available.

  • 1 TBS olive oil
  • 1-2 TBS garlic chives, chopped - whites and greens
  • 1-2 TBS chives, chopped
  • Small leek, chopped - whites and tender greens
  • A few rosemary leaves, chopped (or a pinch of ground rosemary)
  • 1/3 cup (or more) morel mushrooms, chopped
  • 1-2 TBS flour
  • 1/2-1 cup cream or half-n-half - enough to get consistency you want
  • Sea salt
  • Pepper

Saute the chives and leeks.
Add mushrooms and saute until the mushrooms are fully cooked.
Sprinkle in the flour and mix well.
Pour in cream/half-n-half a little at a time and mix well. You want to dissolve all the flour into the liquids.
Add the salt and pepper and cook until thickened.

I used this over egg noodles. It was delicious!!

The sauce was mild enough that the three mushrooms I used easily held their own. If you want to add a little more spice, like thyme or convert it to a stroganoff by adding sour cream, or an Alfredo by adding some Parmesan; I would add more morels. Heck, if I had had them, I would have added more anyway :)

Monday, December 28, 2009

Tomato Lentil Soup/Casserole

I needed to make a quick meal and had been remembering a wonderful minestrone that I had whipped up once, so I decided to try that again. Except I couldn't exactly remember how I had made it, so what I ended up with was different, but equally as wonderful.

I call this a "soup/casserole" since it could really be either. When it was first done cooking it still had a soup consistency, but as it sat, the noodles soaked up most of the remaining liquid and it became a casserole. Either way was very good.
  • 3 cloves garlic minced (I used the garlic I grew this year)
  • 1/2 medium onion, chopped or diced
  • 3 TBS olive oil
  • 1 pint tomato sauce (I used the sauce I canned this fall - YUM!)
  • 3 TBS ground Italian seasoning (basil, oregano, thyme, and rosemary mix)
  • 1 TSP sea salt
  • 2 cups reconstituted lentils (about 1 cup dried - I used two lentils: French and brown)
  • 2 stalks celery, diced
  • 3 medium carrots, sliced (you can leave the skins on)
  • 2 handfuls of uncooked pasta (your choice - used egg noodles)
The first thing that you want to do is start the lentils reconstituting by placing them in a bowl and pouring near boiling water over them.

Heat the olive oil on medium in a soup pan while you mince the garlic and chop/dice the onion. Saute the garlic and onions in the olive oil while you dice the celery. Saute the celery while you slice the carrots. If you like your carrots firm, hold off placing them in the pot until later.


Dump the tomato sauce into the pot. Add a pint of water and mix in the Italian seasoning. Rinse the lentils and add to pot. Simmer for ten minutes. Add the pasta (and carrots if you didn't do that earlier) and simmer until the pasta is cooked. You may need to add extra water during this process (but make sure that the liquids remain bubbly hot or the pasta will cook pasty - Yuck!)

Salt to taste.

This was quick and easy to make. I really liked this and so did my husband (who isn't a big shelled bean fan). It will make great leftovers for lunch tomorrow as well :)

Monday, October 26, 2009

Moroccan Stuffed Acorn Squash

I had two acorn squash that I had to use up soon since I accidentally tore the stem off while harvesting - Oops! Oh well, my loss is my gain as I found some great recipes for this particular squash, and not your run of the mill "drizzle it in honey" recipes. In fact, I found two really interesting ones and couldn't decide, so I made them both!

The recipe base came from elizadomestica.com. Just like Eliza, I had to make a few changes. The original recipe came from the October 2009 edition Martha Stewart Living magazine if you are interested.

The following is my version of this recipe...

Ingredients
  • One medium acorn squash, cut in half and seeded
  • 3 tablespoons of extra-virgin olive oil
  • 1 scallion, separate the green and white parts and chop
  • 1 slice sweet onion, chopped
  • 3 garlic cloves, minced
  • 1/8 teaspoon cinnamon
  • 1/8 teaspoon nutmeg
  • 1 cup chicken bouillon
  • 4 cups water
  • 1 cups of veggie burger mix
  • 1/2 cup barley
  • 1/8 cup raisins, minced
  • 3 tablespoons chopped ripe sweet pepper
  • 2 tablespoons chopped apple
  • 2 tablespoons of toasted pine nuts
  • 1 tablespoons cilantro, minced

Directions

Cut acorn squash lengthwise and remove the seeds. Bake at 350F face down in an oiled baking dish for 30 minutes.

While squash is baking, saute in a medium frying pan white scallion, onion, and garlic in 1 TBS olive oil. Add chicken bouillon and sprinkle in cinnamon and nutmeg. Once the bouillon and seasoning are thoroughly mixed in, add water, veggie burger mix and barley. Simmer for 20 minutes or until the barley is cooked. Add more water during the cooking if necessary to keep it moist.

Near the end of the cooking process, add the raisins, pepper and apple.

Turn the heat up a little, add 1TBS olive oil and allow the mix to dry out so that it holds a form. Add the pine nuts and cilantro and mound into squash halves. Bake for 15 - 30 minutes until squash is soft.

The following are pictures of the squash before and after cooking.


The dark is the Moroccan (the light is the other recipe I tried: Corn Chowder Acorn Squash). This was definitely a great recipe, and, it was even better as leftovers!

Sunday, October 25, 2009

Corn Chowder Acorn Squash

I had two acorn squash that I had to use up soon since I accidentally tore the stem off while harvesting - Oops! Oh well, my loss is my gain as I found some great recipes for this particular squash, and not your run of the mill "drizzle it in honey" recipes. In fact, I found two really interesting ones and couldn't decide, so I made them both!

The base recipe came from fredlet.
  • 1 acorn squash, cut in half lengthwise and seeded
  • 1 tablespoon olive oil
  • 1 cup half & half
  • 1 egg
  • 1 can sweet corn, drained
  • 1/3 cup grated Italian cheese (I used Romano and Asiago)
  • 2 shallots, minced
  • 1 sweet pepper, ripe (orange or red are great) chopped
  • 1/4 teaspoon garlic, minced
  • 1/4 teaspoon fine grain sea salt
1. Turn on your oven to 350F
2. Cut the acorn squash in half and scoop out the seeds with a spoon
3. Cook acorn squash cut side down in an oiled baking pan for 30 minutes.
5. Put the corn, shallots, garlic and sweet pepper in a frying pan (I used cast iron) over medium heat. You want to roast these ingredients. A little charring is ideal, just don't burn them.

Mix egg, half & half, cheese in a saucepan. Warm over low heat to melt the cheese.


Add the roasted mix and continue heating until the chowder thickens. Stuff the squash halves with as much of the chowder as they will hold.
Bake at 325F for 40-45 minutes.

The following are pictures of the squash before and after cooking.


The light one is the corn chowder squash (the dark is the other recipe I tried: Moroccan Stuffed Acorn Squash). This was definitely a great recipe. My son ate a half of one clean and I froze the other for a quick dinner later.

Monday, October 19, 2009

Leek and Potato Soup

I have been trying to grow leeks for three years now since I love them but they get a little expensive in the stores. Well, this year I finally have some!


Not the huge ones you see in the store, but they will work just fine for my leek and potato soup. I evolved this recipe from the one in Renny Darling's Vegetarian Fast and Fancy (one of my favorite cookbooks.

  • 4 small leeks
  • 1 small sweet onion
  • 4 medium potatoes (I recommend one of the golds)
  • 6 cups broth (vegetable or chicken)
  • 4 TBS chopped chives
  • Olive oil
  • White pepper
  • sea salt

Slice the leeks and chop the onions. Saute in a little olive oil.

I use chicken bouillon for the broth and like to add it with the oil as the oil helps break it down faster.

Once everything is sauteed, add all the broth (add 6 cups water at this point if using bouillion), white pepper and salt. Simmer while preparing the potatoes.


Cube the potatoes into 1/2 - 1 in cubes and fry over medium heat.

Once the potatoes are well seared, add them to the soup.

Simmer for about ten minutes.


Add the chopped chives right before serving. Delicious!

This soup always goes fast in my house, and this batch was the best ever!

Maybe it was the home grown leeks...

Sunday, October 11, 2009

Sweet Zucchini Pickles

I had a late bumper crop of zucchini and usually I grate it and freeze it for pancakes, but I was on a canning kick, so I decided to try making pickles with them. Zucchini isn't that much different from cucumbers, except that they have way more flavor and can be HUGE!

I got the base recipe from kitchengadgetgirl website. I say base, because I changed it drastically as I am apt to do. Here is my final recipe:

  • 1 monster zucchini (the kind that you find in your garden and can't believe that you missed it for so long!), fairly scar/blemish free
  • 1/2 cup salt in 1/2 gallon water for soaking zucchini
  • 1 large sweet onion
  • SAUCE:
  • 2 quart apple cider vinegar
  • 2-3 cups brown sugar
  • 1 Tablespoons turmeric
  • 2 teaspoon celery seed
  • 6 teaspoons mustard seed

Slice the zucchini and onion thinly, about 1/16-1/8in thick. When you hit the part that has well developed seeds, just pick them out and leave the slice as whole as you can. Soak the zucchini in the salt water for about an hour.

While the zucchini is soaking, sterilize your jars (if you are going to can this), mix the sauce and bring to a boil. Drain the zucchini and mix with the onion slices.

Pack the hot jars with the zucchini/onion mix and pour the sauce into the jar so that it covers the vegetables and leaves a little less than an inch head space (just past the shoulder).

Process the jars for 10 minutes using the hot water bath method.

These were much different than the sweet pickles I usually make and I think I just might like them even more.

Thursday, September 24, 2009

Grilled Portabella & Pastrami Sandwich

  • Pastrami (I used turkey pastrami)
  • Portabella mushroom cap
  • Mozzarella cheese (I used shredded, you could also use very thin slices)
  • 2 slices of bread
  • Butter
  • 1/2 TBS Olive oil
  • Fresh rosemary
Fry the pastrami and portabello in olive oil and rosemary. Butter one side of each slice of bread. Sprinkle a little cheese on one unbuttered side, lay on the fried pastrami, sprinkle a little more cheese, lay on the portabello, sprinkle little more cheese, add the second piece of bread buttered side out. Set the sandwich in the hot pan to grill both sides.

My son was so excited about this sandwich he had almost half of it gone before I could even take a picture! Two thumbs up from my teen. He reluctantly gave me a taste as well, and I agree it is a keeper.

Monday, March 2, 2009

Grilled Pastrami Sandwich

I only had a little bit of time for lunch and had some wonderful Black Forest rye bread & turkey pastrami. I almost made a grilled cheese sandwich for my son the other day - so why not grill this?

  • your favorite bread
  • pastrami - regular or turkey
  • Swiss cheese
  • spinach
  • butter
Fry the pastrami before assembling the sandwich if you want a great bacony flavor. Place cheese on both halves of the sandwich so that when they melt, they will hold the spinach and pastrami in place. Add the spinach and pastrami, close the sandwich and butter the top and bottom of the sandwich. Place in a pan over medium heat. Cook both sides until toasty and the cheese has melted.

I loved this sandwich! It tasted very much like a non-sour reuben.

Sunday, February 22, 2009

Spinach Stuffed Chicken Breasts

There has been a constant sale on boneless, skinless chicken breasts lately, and the champagne chicken was such a success; I decided to try another stuffed chicken breast. Since I had fresh spinach, I decided to use that. I looked at a couple of spinach stuffed chicken breast recipes and created the following.

  • 1 lb boneless, skinless chicken breasts
  • 1 to 1-1/2 cup chopped spinach
  • 3-4 sliced garlic cloves
  • 1/2 cup French onion dip (because I had some and thought onion would go well with this) or sour cream for milder flavor or even cream cheese for creamier filling
  • 1/4 cup cheese (I was going to use colby jack, but used pepper jack instead)
  • sea salt and pepper
  • olive oil

Mix the chopped spinach, sliced garlic and French onion dip until the spinach is completely coated and the garlic is evenly distributed.

Butterfly the chicken breasts and stuff the filling into the chicken. Top the filling with cheese.

Fold the chicken back up and sprinkle with salt, pepper and oil.

Bake in the oven at 400F for 1/2 hour, or pan fry over medium heat until completely cooked.

This was a very tender, flavorful chicken breast. I definitely want to try this with just sour cream or cream cheese to allow the spinach flavors to show through better. But with the French onion dip the spinach tasted very much like artichoke, which was nice.

My family loved this. I would make it again. It was easy! This can even be made up ahead and stored in the refrigerator until ready to cook.

Sunday, February 15, 2009

Champagne Chicken

This is a great way to use up left over champagne from any celebration, mine was Valentine/anniversary weekend. I had this at a local Italian restaurant a couple of times and liked it enough to try to make it myself. I like mine better.

  • 3 large boneless skinless chicken breasts
  • 6-8 sprigs of fresh young rosemary
  • 6-8 cloves garlic (sliced)
  • 1/2 tsp dried sweet basil
  • 2 TBS butter
  • a little flour
  • 8oz fresh mushrooms
  • 2-3 TBS olive oil
  • 2-3 TBS butter (optional)
  • 1 - 2 cups champagne (I like Ballatore Gran Spumante)
  • 1/8 cup half-n-half
  • salt & pepper


Butterfly the chicken breast (slice the breast like a hot dog bun). Rub each chicken breast with a little sea salt. Stuff each breast with 2-3 sprigs of rosemary, a sprinkling of dried basil, a TBS or more of sliced garlic, and 1/2 TBS of sliced butter. Pepper each breast and refrigerate for at least an hour to allow all the spices to penetrate the meat. The longer you leave it, the more the meat will absorb the flavors. If you like, you can set the chicken in 1 cup champagne about 1/2 hour before cooking.

When ready to cook, heat a frying pan on medium heat. Add 2-3 TBS olive oil. Place the breast in the pan and dust with a little flour. Keep an eye on the heat; you don't want to burn the flour. Flip them carefully away from the cut side and dust the other side with flour. Once the one side is seared, flip again to sear the other side.

Push the chicken to the side of the pan and add the sliced mushrooms and the additional butter if desired. Once the mushrooms are seared, add the champagne - you can add the champagne that the chicken was sitting in as well.

Turn to low heat. Cover and let cook for about 5-10 minutes until the chicken is cooked through. Take the chicken from the pan. Turn the heat back to medium. Add the half-n-half to the pan. If you would like a thicker sauce, mix a little flour to the half-n-half before adding to the pan.

Serve the chicken topped with the sauce.

This, as I said, was delicious. The sauce had a tangy, almost bubbly zip. I served this with a cabbage salad and fried mashed potato patties.

Sunday, April 30, 2006

Potatoes and Parsnips in Four Cheese Herb Sauce

OH.MY.GOSH!!

I made the most delicious sauce today!
Seriously, I almost cried.

  • 1 sweet onion, chopped
  • 3 cloves garlic, minced
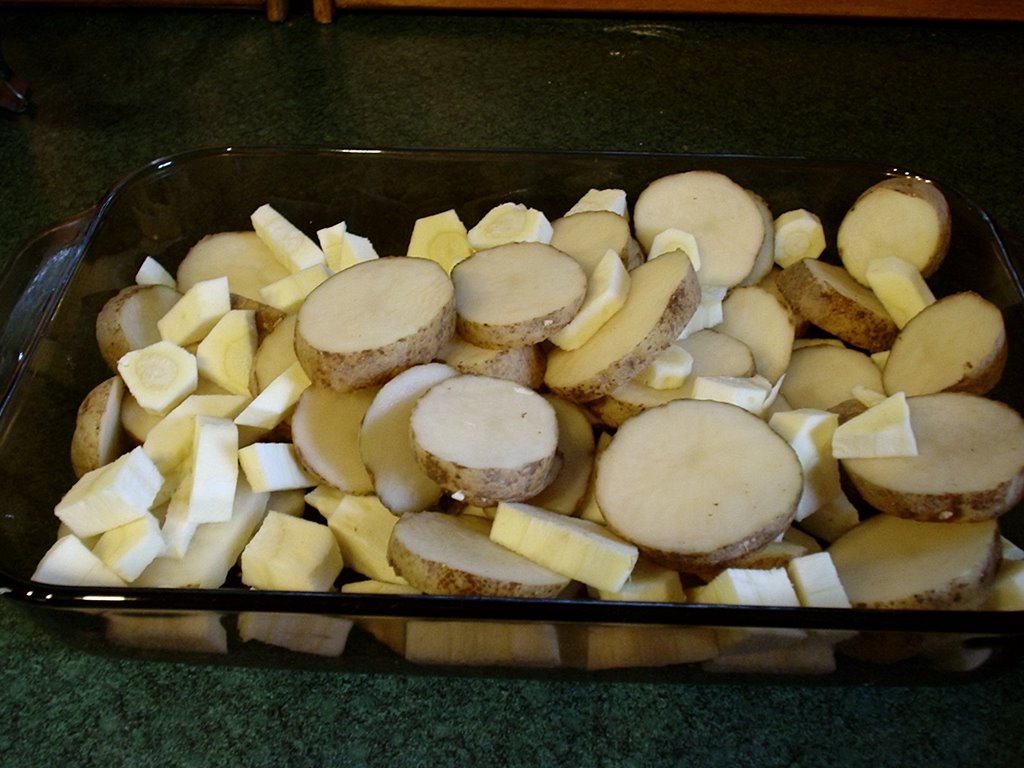
  • 4 medium potatoes, sliced
  • 2 parsnips, chopped
  • 2 TBS olive oil
  • 3 TBS butter
  • 1/8-1/4 cup flour
  • 1 pint half-n-half
  • 2 TBS thyme
  • 2 TBS Italian four cheese mix
  • salt & pepper


Saute the onion in olive oil over medium heat. When the onion is about half cooked, add garlic. Add butter, be careful to monitor heat so that the butter melts but doesn't burn. Once it is melted, mix in enough flour to make a paste. Mix in half and half, thyme, four cheese mix and sea salt and pepper.

O.M.G!! It was YUMMMMMY!!! I wanted to eat it right then.

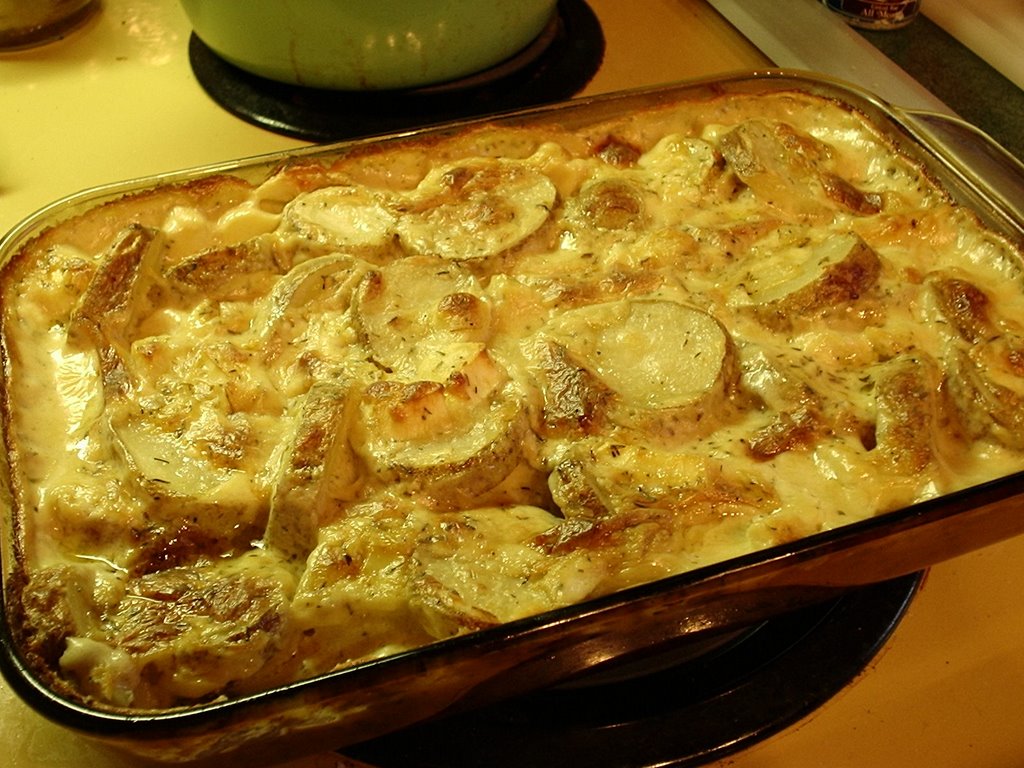
Place potatoes and parsnips in a baking dish. Pour the sauce over the potatoes and parsnips mixed it in, and bake the whole thing at 350F for an hour.

It was delicious!! I will definitely make this again. My son and husband weren't so sure about the parsnips (although they each had two huge servings), so I may omit them in the future. I think they just weren't expecting them.

In any case, I definitely have big plans for that sauce!

Monday, March 6, 2006

Cream of Cauliflower Soup

I love cream-of soups. They are my favorites. But I have had so much trouble finding a good recipe for them. I have tried many different ones over the years without much luck.

But if at first you don't succeed -- try, try again.

I had some left over cauliflower and half-n-half and some determination, so I decided to make cream of cauliflower soup.

I found recipes for cream of mushroom and cream of celery so I took some ideas from them and then just had to wing it. I've made lots of from-scratch pudding and thought the base for the soup would be very much like that.

  • 1/2 head cauliflower
  • 1 thick slice sweet onion
  • 2 TBS butter
  • 3 chicken bouillon cubes
  • 1/8 cup flour
  • 1/8 cup Swiss cheese - chopped or grated
  • 2 cups half-n-half
  • 2-1/2 cups water
  • 1 egg - mixed well

Chop up cauliflower and throw into a sauce pan with 1/2 cup water. Cook on medium heat.

Finely chop one thick slice of sweet onion. I love the Andes sweets, or, if you can get it, my all time favorite is Vidalia! Throw the chopped onion in with the cauliflower along with two tablespoons butter.

When the cauliflower is just about cooked through and the water has boiled down, throw in bouillon cubes. Sprinkle flour over the cauliflower and mix in.

Turn down the heat and pour in half-n-half, rest of water, and egg. When the soup has heated up, add Swiss cheese. Cook until thicken.

Once the cream has been added, DO NOT OVER HEAT!!!

This was the best cream-of soup that I have ever made. I would definitely make this again, and I plan to try other versions, like: mushroom, broccoli, potato... OH! I CAN'T WAIT!!

Saturday, January 14, 2006

Mixed Veggie Pakoras

Mmmm... Indian food! Most Americans have made some Italian food, Mexican dishes, and possibly even tackled a French or Chinese dish or too - even if they were highly Americanized. But I don't know too many people that have tried Indian food, let alone tried to make it themselves.

So, when I got my new favorite cookbook, probably my favorite recipe book of all-time, I marked the pakoras on my list of recipes to try.

I made them last week, and as usual, I didn't have all the right ingredients, so I improvised. Maybe that is a talent.

Here's the recipe as is in the book:
  • 6 TBS gram(besan) flour
  • 1/2 tsp salt
  • 1 tsp chili powder
  • 1 tsp baking powder
  • 1-1/2 tsp white cumin seeds
  • 1 tsp pomegranate seeds
  • 1-1/4 cups water
  • 1 TBS finely chopped cilantro
  • your choice of vegetables
  • vegetable oil for frying
Well, I thought I had besan (gram flour), which is a flour made from chickpeas/garbanzo beans; but alas, I did not. SO, I took some dried chickpeas and ground them into a powder with my blender. Only realizing afterwards that taking canned chickpeas and grinding them up would have been much easier! Oh well, NEXT TIME!

First you add everything but the cilantro and vegetables. Using a grinding mixer (I used a hand mixer), blend until smooth. Instead of white cumin seeds, I used cheap-brand cumin and PLENTY of it! 1-1/2 tsp my ass! I used cayenne pepper for the chili. You can use any kind of chili pepper you want. Some pepper may be too distinct for this dish, but off hand none come to mind - so just use what you want. I also threw in extra gram and some regular flour because the batter was so soupy. I figured that the batter should have the consistency of onion ring batter.

I also threw in extra pomegranate seeds. This is my first run in with a pomegranate. Interesting fruit. I will have to find more uses for it. But it is SO expensive! I figured since I had gone through so much trouble getting the sucker open and really didn't know what else I would use it for, I should throw extra seeds into this recipe. I think I used about 3-4 TBS.

Once the batter is the way that you would like it, mix in the chopped cilantro. Once again, I threw in extra because I LOVE cilantro!!

Start heating a few inches of oil in a heavy pan. The pakoras should be able to float. Or if you have a deep fryer you can use that too. I used peanut oil.

Once the oil is hot enough to fry, mix the vegetables of your choice into the batter. I would suggest using fresh vegetables. I used frozen mixed veggies with the beans, peas, corn, Lima beans, and carrots - but we all agreed that even though the pakoras were very good, they would have been great if I had used fresh veggies.

Cauliflower is a good one to use for this. I also chopped up potatoes and added this to the frozen mix veggies. That was really good. Just use what you like. I do have to say that this batter makes Lima beans delicious (well, probably as delicious as Lima beans can get anyway).

Using a slotted spoon, spoon the veggies out of the batter and into the hot oil. Be careful the oil isn't too hot or the batter will burn and the veggies won't cook. Turn the pakoras once they appear to have browned nicely on the underside. Fry the other side until it is also deep brown.

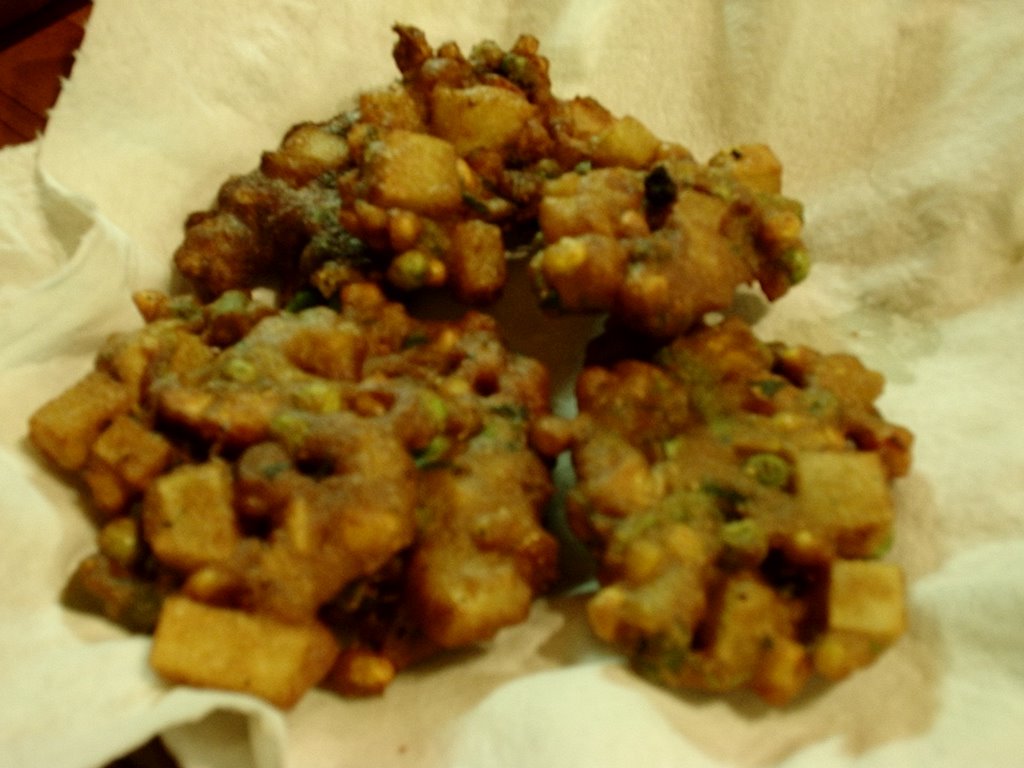
Using another slotted spoon, take the pakoras out of the oil and place onto a plate lined with a paper towel to drain the excess oils.

The finished pakora pictures didn't turn out that great, but the pakoras sure were tasty!

Serve these hot on their own or you could make a yogurt sauce for them. They are also very good reheated later.

Thursday, January 12, 2006

Sesame Hot Bastard Noodles

Ah! Making these noodles was a test in patience. Not because they are so hard to make, they are actually quite easy. It was due to a series of unfortunate events. First, I spilled hot oil all over the stove and floor. It took nearly an hour to get it all cleaned up. Then I realized that I didn't have enough sesame seeds. Then, while I was toasting what little seeds I could find, I had to help my son chop the cilantro and I ended up almost burning the seeds. Then, when I put the peanut butter in the pan, it nearly burned too, even though I had the heat turned down to "warm". All while I was making the noodles I kept yelling "bastard" so my husband SSB suggested that would be a good name for them. I wasn't sure how they would turn out considering all the problems, but they were NUMMY!!

  • 1 lb spaghetti
  • 1 TBS sesame seeds
  • 1 TBS sesame oil
  • 1 TBS peanut butter, smooth or crunchy
  • 2 TBS chopped chives
  • 3 cloves minced garlic
  • 2-3 TBS soy sauce
  • 1 TBS lime juice
  • 4 TBS chopped cilantro
  • 1/16 - 1/8 tsp ground cayenne pepper
  • 1/4 cup chopped cashews
  • Salt and pepper

Toast sesame seeds. Turn down heat. Add a tablespoon of sesame oil (or just use what you have). Throw in minced garlic. When the garlic has turned translucent, add peanut butter. Sprinkle in cayenne pepper and add chopped chives. Stir in soy sauce and lime juice.

When everything is mixed into a nice sauce, remove from heat and add cilantro. Add the cooked, drained noodles and stir to coat them all with the sauce. Salt and pepper the whole thing. Top everything with cashew pieces and serve.