Showing posts with label Appetizers. Show all posts

Monday, December 17, 2018

Vegetarian Swedish Meatballs

I was bringing Swedish meatballs to the potluck at work, and wanted to bring a vegetarian version as well. I really couldn't find a good one online, so as usual, I made one up.

I had a lot of trouble getting the flavor of the meatball the way I wanted it, I accidentally used twice as much black pepper than I intended, and I couldn't get a veggie brown sauce that didn't taste like bitter onion soup - so I almost scrapped the whole thing. However, after a few additions to the meatballs and an herb sauce in place of the brown sauce, they turned out great! I am planning to make bunches to freeze, and make Italian versions for spaghetti as well.


meatballs:
  • 8 oz cooked black eyed peas, drained and mashed
  • 1/2 onion, minced (can saute or leave raw)
  • 3 TBS olive oil or melted butter
  • 1/3 cup bulghur wheat, soaked overnight, drained
  • 1/3 cup oatmeal, cooked or soaked overnight in water, milk, yogurt, or sour cream
  • 1 tsp nutmeg
  • 1/4 tsp allspice
  • 1/2 tsp black pepper
  • 2 TBS soy sauce (Kikoman works very well for this)
  • 1 tsp thyme
  • 1 tsp garlic salt or adobo
  • 2 eggs
gravy:
  • 1 cup milk or cream
  • 1/4 cup flour
  • 1 tsp thyme, ground
  • 1 TBS parmesan/romano or Jarlsberg, shredded
  • 1 tsp garlic salt or adobo

Heat oven to 300F with a small pan of water on the lower rack.

Mix meatball ingredients together.
Form into 1" balls and place on a well oiled cookie sheet. (They are easier to roll if you cool the mix).
Drizzle or brush olive oil on the balls.
Bake for 30 mins. Make sure to keep the water pan filled as they bake.

Mix gravy ingredients in a medium sauce pan and bring to simmer.
Simmer until it thickens to the desired consistency.
If you are having trouble getting it thick enough, add a little more flour mixed in milk to the mixture, and simmer some more.

Serve the meatballs with just the sauce or over noodles.

Friday, November 2, 2018

Nacho Bake

I had some stale tortilla chips to use up, so I just whipped up a nacho bake! It was so good that my son joked that he is eagerly awaiting for more tortilla chips to go stale. You don't have to wait for stale chips to enjoy this easy bake dinner. 
  • 1 lb ground meat (vegetarian option below*)
  • 1 can Fire Roasted Rotel
  • 1/8 cup water
  • taco seasoning (whichever one you like)
  • 1 can black beans
  • 1 TBS olive oil
  •  4-6 cups tortilla chips (these can be somewhat stale, it'll taste the same)
  • 3-4 cups shredded Mexican mix cheese (I used one with Monterey jack, medium cheddar, queso quesadilla, and asadero)
  • 1/8 - 1/4 cup Mezzetta Hot Cherry Peppers, chopped into small pieces
  • 1/8 cup liquid from the jar of peppers
Heat a skillet over medium heat. Add the ground turkey, water, the whole can of Rotel (liquids and all), liquids from the can of beans, and the  taco seasoning. Cook until browned. This should be a little saucy, so add additional water if necessary as it cooks.

Spread the olive oil in the bottom of a 7x11 (2 quart) baking dish. Fill the dish about half way with tortilla chips. Sprikle cheese over the chips just enough to lightly cover them. Spread the meat mixture over the cheese. Spread the beans and peppers over the meat. Sprinkle more cheese over the top (I use enough to completely cover all other ingredients). Pour the pepper liquid over the top.

Bake at 300F for about 20 mins. It's ok if the cheese browns or doesn't brown; it is good both ways.

Serve as is; or with sour cream, taco sauce, avocados/guacamole, or more chips!
*This can be easily turned into a vegetarian dish by using 2 cans of black beans, mashed, in place of the ground meat, and omit the layer of whole beans.

Monday, October 17, 2011

Ginger Garlic Wonton Packages

I had some interesting wontons from the local food co-op and knew I had to try to make my own.

Mine were better!

  • 1 head nappa cabbage, shredded
  • 1 bulb garlic, minced or put through a press
  • 2 TBS fresh ginger, minced
  • 2 scallions, chopped - use white and green parts
  • 1/8 cup chopped carrots
  • 1 package wonton wrappers
  • 2 cups peanut oil
I threw the first five ingredients into my electric chopper to get it into a fine slaw.

Spoon into wonton wrappers.

Fold the corners to the middle like an envelope and seal together with water. I found that wetting my hands slightly before handling the wrappers helped a lot.

Fry in peanut oil on medium high heat. You want them to cook quickly but not burn.

Serve on their own as they are really flavorful, or you could serve with sweet pepper dipping sauce.

These were easy and quick to make, and DELICIOUS!!

Tuesday, November 16, 2010

Avocado Margherita

I love avocados, even if I seem to be alone in that love in my household. This recipe is one of my favorite ways to prepare them.


  • Avocado - halved and pitted (I also peel mine, but you don't have to)
  • 2TBS diced red onion
  • 1 garlic clove, minced
  • 1/4 cup diced fresh tomato
  • 2 TBS fresh basil, shredded (can substitute 1 tsp dried basil)
  • 2 thin slices of mozzarella
  • 1 TBS olive oil
  • Salt and pepper
Oil a small bread pan. Place the avocado halves into the pan and sprinkle with a tiny bit of olive oil. Place the garlic, tomato, onion, and basil into halves. You can pre-mix these first if you want. Cover the avocado halves with the mozzarella slices and bake in a 350F oven until cheese is melted, and golden brown if you like.

Serve them warm with salt and pepper.

They are hearty, tasty and filling!

Monday, January 4, 2010

Tunisian Brik

I wanted to add some more appetizers to my repertoire, so when I found a recipe for Tunisian Brik in my appetizer cookbook ("Appetizers, Finger Food, Buffet & Parties", by Bridget Jones) I had to try making it. I did make a few small changes - of course. The following is what I came up with.
  • 3 TBS butter, melted
  • 1 small red onion, finely chopped
  • 1 lb ground turkey
  • 1 garlic clove, minced
  • 1 TBS lemon juice
  • 2 TBS finely chopped cilantro
  • 1-2 eggs, scrambled
  • phyllo dough
Start by mixing everything but the egg and phyllo dough in a frying pan and cook until meat is thoroughly cooked. Then it is on to phyllo dough!

Let me start by saying that phyllo dough is a mother to work with! It is very thin, tears easily, dries out quickly, and then crumbles. I kept a mister handy to keep the dough moist; but be careful! If you get the dough too moist, it sticks to everything!


I laid out two sheets. the recipe called for brushing with melted butter, but due to the delicacy of these sheets, I sprayed them with Pam instead.
The sheets were rather large, so I cut them into sixths.
Then I folded each of the pieces until they made 3"x3" squares.

They don't need to be perfectly even. As you can see, some parts have more layers than others.
Place a tablespoon of the meat filling in the center of each square and a teaspoon of egg over that.

Fold the phyllo corner to corner and seal with a little water. Place the triangles on a greased/oiled baking sheet and drizzle with olive oil.
Bake at 425F for 8-10 minutes. They should be golden brown.


These were AWESOME! And once you get the hang of handling the phyllo dough, they are amazingly easy to make!

Saturday, October 17, 2009

Apple Chips

I went a little nuts this year. I told my apple orchard friend that I would like 3-4 bushels of apples for making applesauce. He gave me close to four bushels. What was I thinking?! After having made about forty quarts of apple sauce, I decided that I might want to make something else with the remaining apples.

I love the apple chips that I have gotten from the stores -- the very expensive apple chips. So why not make those? And guess what? They are easy!

I borrowed a cast iron apple peeler/corer/slicer. This tool slices the apples to the perfect thickness - about 1/8 inch --, but you could do that by hand. You don't have to peel or core the apple. Just slice the apple into 1/8in thick slices and pop the seeds out. If you use the peeler/corer/slicer, disengage the peeler. The apple will be sliced in a spiral with this tool, so line up your knife with the spiral end and slice through one side of the apple. This will leave you circles instead of a spiral.

If you want them flavored: mix 4TBS brown sugar, 1/2 - 1TBS cinnamon, and 1/8-1/4 cup water. Dip the slices in the mixture, shake them off and lay them in a single layer on a dehydrator* tray sprayed with Pam. IMPORTANT: If you do not Pam the tray, you will not be able to get the chips off the tray! I learned this the hard way and lost half my first batch.

Let them dehydrate about 18-24 hours. They may feel a little pliant when you remove them, but once they cool they should be as crispy as a potato chip.

These are addictive, but as healthy as they are, that's just fine. You should be able to store these as long as any other dried fruit, but you probably won't have to worry about storage times as they won't stick around long!

*If you do not have a dehydrator, you can do this in the oven. I didn't do any batches in the oven, so I'm not sure the best way to do that, but I hear a SilPat is indispensable. I don't have one, so I would line my cookie sheets with my cooling racks, Pam those and lay the apple slices on that. If I ever try the oven, I will update this post with directions.

Sunday, October 11, 2009

Sweet Zucchini Pickles

I had a late bumper crop of zucchini and usually I grate it and freeze it for pancakes, but I was on a canning kick, so I decided to try making pickles with them. Zucchini isn't that much different from cucumbers, except that they have way more flavor and can be HUGE!

I got the base recipe from kitchengadgetgirl website. I say base, because I changed it drastically as I am apt to do. Here is my final recipe:

  • 1 monster zucchini (the kind that you find in your garden and can't believe that you missed it for so long!), fairly scar/blemish free
  • 1/2 cup salt in 1/2 gallon water for soaking zucchini
  • 1 large sweet onion
  • SAUCE:
  • 2 quart apple cider vinegar
  • 2-3 cups brown sugar
  • 1 Tablespoons turmeric
  • 2 teaspoon celery seed
  • 6 teaspoons mustard seed

Slice the zucchini and onion thinly, about 1/16-1/8in thick. When you hit the part that has well developed seeds, just pick them out and leave the slice as whole as you can. Soak the zucchini in the salt water for about an hour.

While the zucchini is soaking, sterilize your jars (if you are going to can this), mix the sauce and bring to a boil. Drain the zucchini and mix with the onion slices.

Pack the hot jars with the zucchini/onion mix and pour the sauce into the jar so that it covers the vegetables and leaves a little less than an inch head space (just past the shoulder).

Process the jars for 10 minutes using the hot water bath method.

These were much different than the sweet pickles I usually make and I think I just might like them even more.

Thursday, September 3, 2009

Cherry Bomb Salsa

I have a bunch of tomatoes ripening in my garden, so I have been canning. I only can high acid foods since I don't have a pressure canner, and I never had experience with one (that may change next year). Most tomatoes are naturally high in acid, so they can be canned using the hot water bath method.

I wanted to make salsa but didn't have enough jalapeños, so I ordered a pound of Cherry Bomb peppers from our local coop. I like these peppers a lot because they have the sweetness of the ripe red sweet pepper but a nice bite of a mild jalapeño.
This makes four quart jars of salsa.
  • 1 gallon crushed tomatoes
  • 1/2 lb Cherry Bomb peppers, tops and seeds removed (leave seeds for more heat)
  • 1 medium sweet onion, bottom and skin removed
  • 1 bulb garlic, skins removed
  • 1 tsp sea salt, or more to taste
  • 1/4 cup lemon juice (necessary for water-bath canning; you can omit if pressure canning)
  • 2 TBS brown sugar (it cuts down on the harshness of the acidity necessary for water-bath canning these)

Chop everything and put in a large pan to reduce until thickened. You can either let cool and eat it right away or you could can this for later. I did can this but had some leftovers to try. It was very good, but mild. I will add more peppers or leave the seeds in for more heat next time.


For canning:
*Please visit the National Center for Home Food Preservation site for proper canning instructions. Although no one has ever fallen ill from my canning methods, I may be omitting proper procedural steps here.*

While the salsa is boiling down, put the rack in the water-bath pan, fill 1/3 way with water, and bring to boil. Wash four jars, lids and bands. Carefully examine each jar for any damage; do not use jars with any amount of damage (you can save these for storing dry foods). Sterilize the jars and lids by placing in the boiling water for ten minutes.
Fill the jars with the hot, reduced salsa to 1/2 inch from the top. Wipe the rim with a clean, damp towel. Place a lid on and hand-tighten a band on the jar.
Place the jars in the water bath. When the temperature has reach at least 212degrees, place a lid on the pan and maintain temperature for 35 minutes.
Remove the jars carefully. Place on a towel or cooling rack leaving at least an inch in between all jars. You should hear the lids contract, making a popping/pinging sound. Let them cool for 24hrs before checking for proper seal, labeling and storing in a cool, dry, dark place.

I try to use up my canned goods within a year for best taste and throw out everything that's older than three years just to be safe. But when I was growing up, we often ate home canned goods that were over five years old and we're all still alive!!

*I also found this site to be very good at basic canning instructions.*

Thursday, January 15, 2009

Yummus Tacos y Taquitos

As you may remember from my Yummus post, I had a large amount of it left over from the New Year Eve party. Remembering what a friend of mine had said when I had first introduced him to hummus, "Oh, it's like a bean dip!" I decided to make tacos from the remaining hummus.

The Yummus recipe was:
  • 1/4 garbanzo bean flour
  • 1 cup water
  • 1 cup tahini
  • 1/4 cup sesame seeds
  • 1/4-1/3 cup olive oil
  • 2 TBS lemon juice
  • 2-3 garlic cloves
  • 2 TBS lemon grass
  • 1/2 tsp cayenne pepper
  • 1/2 tsp paprika
  • 1/2 tsp ground cumin
  • 3/4 tsp sea salt
  • 1/4 tsp ground pepper
To this I added a packet of taco seasoning. The mix should be just thin enough to spread - not too thin!


Bake at about 350F for about 10 minutes (5-7 minutes if using a toaster oven). If you want a more pliable taco, bake at a lower temp for less time.


I also made taquitos since I had kids in the house that day and didn't want taco toppings all over the living room while they were playing video games. I just cut the taquitos into bite sized pieces. Some have cheese in them, some don't. The kids cleaned two plates of these!


The tacos I topped with a mix of my home-made salsa, sour cream, and avocados with some romaine lettuce thrown on top.


OMG!! It was SO GOOD!! I would buy this at a restaurant.

Saturday, January 10, 2009

Yummus

For the New Year party I also made hummus for the first time. I started with the recipe from the Red Mill bag of garbanzo bean flour. [This post is mostly the making of the recipe. If you just want the finished recipe go here]

3/4 cup garbanzo bean flour
2-1/2 cup water
2-3 garlic cloves
1/4 cup chicken broth (I skipped this)
1/4 cup sesame paste (I didn't have this, so I mashed 1/4 sesame seeds with a chop/blender)
1/4 cup lemon juice (I didn't have this so I added 2 TBS lemon grass instead)
1/8 tsp tabasco sauce (I substituted powdered cayenne pepper because I like it)
1/2 tsp ground cumin (I totally missed this - you'll see this come up later)
salt & pepper to taste (1/2 tsp sea salt and 1/4 tsp ground pepper)
1/4 cup olive oil

Which gave me this:
A hummus paste, or more accurately, lump. I wasn't sure that it was going to even work, and was short on time, so I abandoned it to the fridge until later. After all other appetizers were done, I did have time to work with it, and I had picked up tahini and lemon juice as well.

I spooned out about 1 cup of the lump and added 1 cup tahini, 1/4 cup water, and 2 TBS lemon juice and mixed until smooth. It is MUCH easier to get a smooth mix if you just mix the lump and the tahini together first, then add the water.
The flavor still was not right, so I added 1/4 tsp sea salt, mixed and tasted. Still not right. So I added 1/4 tsp more cayenne pepper and 2 more TBS olive oil. Good, but still not right. It needed some depth. It could use some more garlic, but I was going for at least one dish that wasn't garlicky.

SSB asked me if we had any Middle Eastern spices. I added 1/2 tsp paprika. Better, not quite there. There was a taste in my mind... what is it? CUMIN! It really needed cumin! So I added 1/4 tsp cumin, tasted and added 1/4 more. Perfect! Then I looked at the original recipe and noticed that it actually had cumin in the ingredient list and I had just missed it. Silly me!

Here is the final result. The little dish to the right is my trial dish that I used to try out a few variations before I made the changes to the main mix.


My final recipe for a batch was probably close to this:
  • 1/4 garbanzo bean flour
  • 1 cup water
  • 1 cup tahini
  • 1/4 cup sesame seeds
  • 1/4-1/3 cup olive oil
  • 2 TBS lemon juice
  • 2-3 garlic cloves
  • 2 TBS lemon grass
  • 1/2 tsp cayenne pepper
  • 1/2 tsp paprika
  • 1/2 tsp ground cumin
  • 3/4 tsp sea salt
  • 1/4 tsp ground pepper
Put everything into a mixing bowl and blend using a chopping/blending handmixer until smooth. If it is too thick, add a little more liquid (lemon juice if you like a snappier hummus, olive oil if you like a super smooth hummus, or just water if all is good and you just need it so you can get a chip into it!). And of course, all spices are adjustable to taste. If you are not serving immediately, you should bring to room temperature before serving. This is great with flatbread chips/crackers, rice chips, or tortilla chips.

If you want a garlicky hummus, just add more garlic!

It was delicious! And I got lots of compliments at the party for it not only being really rich, but amazingly smooth! And I had so much of the original lump left over that I made it up for work as well, and it was a hit there too! I also had enough of the lump left to make another yummy goody that I will post about later.

Thursday, January 1, 2009

Apple Brie Flatbread

Earlier this year I had the good fortune to attend a drug rep dinner being hosted at a local up-scale restaurant that I had never been to. The food was amazing! But the item that I came away thinking, "I have got to figure out how to make THAT" was the Apple Brie Flatbread. It was a crispy, almost cracker flatbread topped with apples, brie, nuts, carmelized onion/shallot, and balsamic vinegar reduction. YUMMY!!!

It was actually a lot easier than I thought it would be. The hardest part was figuring out a bread recipe. I have a fantastic bread machine book that I got from Borders (a very dangerous place for me!). If you love bread, get this book! The recipes will work great as hand-mades too. I often just make the dough with the machine and bake the bread in my oven. That is the case with the flatbread I made for these appetizers.

There are a lot of flat breads in the book, but I chose Carta di Musica as it seemed the closest to that nearly-cracker flatbread.
  • 1-1/4 cups water
  • 4 cups flour
  • 1-1/2 tsp salt
  • 1 tsp sugar (I actually used 1 TBS C&H dark brown sugar, cuz that's what I like!)
  • 1 tsp yeast
Put it in the bread machine in this order and run it through the dough cycle. Take the dough out and cover with a piece of plastic wrap while you work. Break off a small piece, about the size of a walnut. Roll out the piece to as thin as you can get it. It helps to keep the dough from sticking if you ocassionally oil the rolling pin. As you finish rolling each piece, place it in a stack under a piece of plastic wrap to keep them from drying out.

Once you have enough rolled to fill a cookie sheet, place them on the pre-heated sheet and bake them in the oven at 450F for 10-15 minutes. For this recipe, you will want to take them out while they are still light as they will go back into the oven for a second baking.

The topping is fairly self explanatory: apples, brie, nuts, carmelized onion/shallot, and balsamic vinegar reduction.
  • The apples can be any kind. I like to use sweet, crisp apples like my current fav -- Honeygold.
  • I love Joan of Arc brie, unfortunately my grocer has been having trouble getting it so I picked up some Delice de France. I liked this very much as well. It is different in that it is stronger, but it is delicious!
  • The nuts could be walnuts, pecans, hazelnut, almost any nut -- I LOVE pecans, so that's what I used.
  • My son does not like onions, so I skipped the carmelized onion/shallot part. It is very good though, so you might want to try it yourself. I recommend using either shallots or very sweet, mild onions like Vidalia. Slice them thinly and cook over medium low heat until carmelized.
  • I used about 6oz of balsamic vinegar. It needs to be reduced to something resembling molasses by heating it over low heat for about half hour. DO NOT LET IT BURN!
Thinly slice or dice the apples and brie and place desired amounts of each on the flatbread pieces. Sprinkle with chopped nuts. Drizzle the balsamic vinegar reduction over the topped flatbreads (if you accidentally reduced it too much to drizzle, just add a little water or more balsamic vinegar). Place in the oven until the brie is melted.

OMG!! THESE ARE DELICIUOS!! They were so great, I didn't even get a chance to take a picture before half of them were devoured by onlookers at our New Year Eve party! These are best fresh from the oven, but can be re-heated in the microwave or eaten cold as well.

Bruschetta

There was a New Year Party at my house, and I was inspired to make some very yummy appetizers. I'm going to make each recipe a new post, so watch for the others over the next few days. I'm going to start out with double tomato bruschetta.

When my son asked me what bruschetta was, the best I could come up with was "Italian salsa". I think that is a fairly good explanation. I got this recipe from AllRecipes. I read through the comments before I chose it, and ultimately made it, for ideas. Many said MORE BASIL AND LOSE THE CHEESE. The following is what I ended up with after making some slight changes:

* 6 roma tomatoes, chopped
* 1/2 cup sun-dried tomatoes softened in 1/8 cup olive oil
* 3-6 cloves minced garlic
* 2 tablespoons balsamic vinegar (I used Alessi - my favorite so far)
* 1/3-1/2 cup fresh chopped basil
* 1/4 teaspoon sea salt
* 1/4 teaspoon ground black pepper
* 1 French baguette (I use the New French Bakery Take and Bake brand - THE BEST!!)
* 1/8 cup olive oil


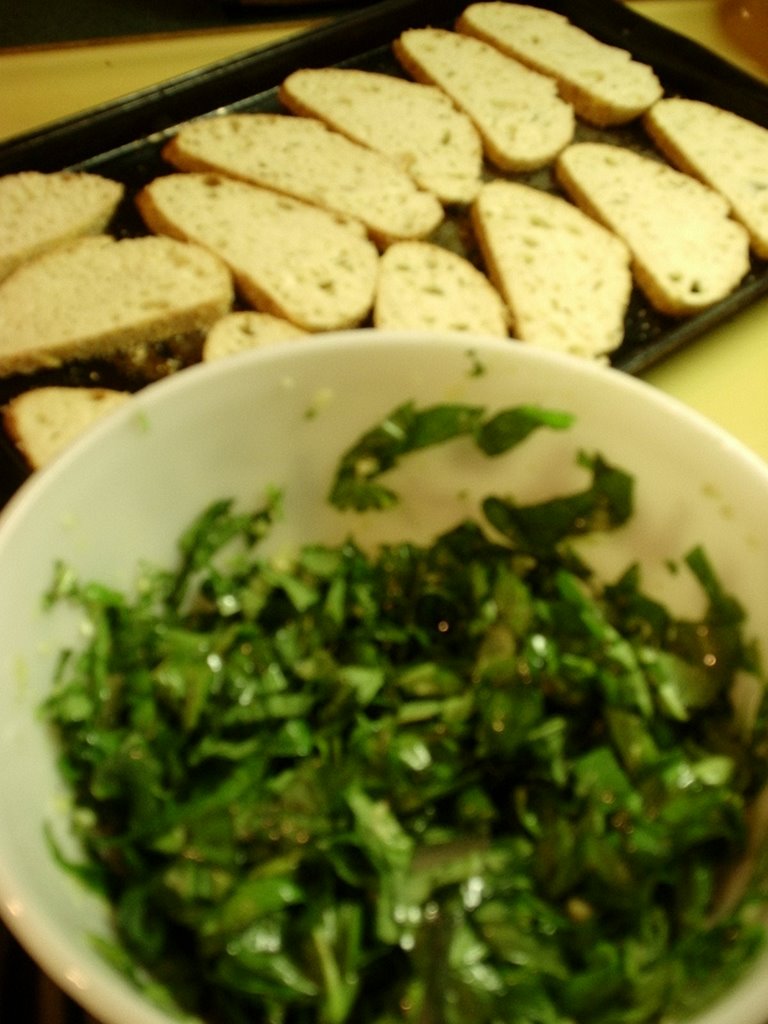
The original recipe calls for sun-dried tomatoes in oil, but I only keep the dried variety -- so I just took some of the oil called for in the recipe to soak my dried tomatoes. Chop them up when soft enough. Mix with the chopped Romas, basil and minced garlic. Add the two tablespoons of balsamic vinegar, sea salt and pepper.

This smells DELICIOUS freshly made, but the flavors are still pretty separate at this point. This can actually be good when you are going for dramatic, but if you want subtle, well melded flavors, let it sit overnight in the refrigerator.

The original recipe calls for the mix to be put on the cut pieces of baguette then broiled until the cheese is melted, but, I agreed with the commenters that suggested serving the mix on the side and allowing people to add their own topping -- not everyone likes the same amount of topping, plus the toast will stay toasty. SO, right before serving, cut the baguette into 1/2-1" slices, brush with olive oil and broil to toast.
Serve the mix at room temperature with the toasted baguette. I also had a dish of Romano cheese that could be sprinkled over the top.

The bruschetta was very easy and very popular. I will definitely be making this again.

One thing I might try next time is reducing (boiling down) the balsamic vinegar a little to deepen the flavor, but this was also great as is.

Another note: I brought the left overs to work on Friday (about 36 hours later) and it was even BETTER!

Sunday, December 14, 2008

Turkey Meatballs with Wine Sauce

I had a work party to go to and needed a dish to bring. I wanted something that could be a meal dish or h'orderves. Meatballs would sure fit that bill. I have my very own recipe for meatballs that I just LOVE!

Turkey Meatballs

2lbs ground turkey
1 sleeve of saltines
3 TBS rosemary
1 TBS Italian seasoning
1 TBS thyme
2-3 eggs
1-3 small cloves garlic minced
1/2 sweet onion minced
a couple of dashes olive oil
Salt and pepper

I do not eat mammals, but poultry is fair game! I thawed out 2lbs of ground turkey. Nothing like meat in a tube!
Pre-heat the oven to 350°. Mix all the ingredients together and roll into balls. I chose to roll them into small balls that could be picked up with toothpicks, but you could make them as big as you like. place them on a cookie sheet. They can be very close to each other. Bake until they are completely cooked.

These are DELICIOUS!
And they go really well with spaghetti and sauce.

Speaking of sauce, my husband thought a sauce might be nice with these, so I made one up for them.

Wine Sauce

1/2 bottle Madeira wine
4oz rice vinegar
1/4 cup apple cider vinegar
1-2 tsp soy sauce
2 TBS stone ground Dijon
1 TBS cornstarch dissolved in water

Put the first 4 ingredients in a saucepan on medium heat. Simmer until the liquids start to concentrate. Add the Dijon and the dissolved cornstarch. Stir over heat until thickened.

Serve with the meatballs, or any other meat that might go well with a wine sauce. It is fantastic!

These were a big hit at the party. People were asking about the meatballs and the sauce. I rock!

Saturday, February 10, 2007

Turkey Meatballs

These meatballs I made on the spur of the moment. We needed something to eat and I was sick of boxed meals.

1 lb ground turkey
2 tsp dried rosemary
1/3 sweet onion, minced
2 cloves garlic
1 egg
1 sleeve saltines, crushed
1 TBS oregano
1 TBS basil
salt & pepper
2 TBS olive oil

In a bowl I mixed the ground turkey, egg, saltines - crushed, onion, garlic, rosemary, oregano, basil, salt and pepper, and olive oil.

Form the mix into bite-sized balls and place them on a cookie sheet.

Bake in a pre-heated oven at 350F for about 20-30 mins.


These came out slightly crispy on the outside which was fantastic. I served them with spaghetti pasta and marinara sauce. The meatballs were YUMMMY! I will definitely make these again, but I would serve them with a sweeter sauce next time.

Monday, September 11, 2006

Pesto Bread

I was at a kiln firing party this weekend. Someone brought some wonderful toasted bread topped with pesto. I loved it so much that I decided I had to try to figure out how to make it.

It was actually quite easy.
  • 1 loaf Italian or French bread sliced into 1/4-1/2 slices
  • 3-4 cups fresh basil
  • 5 cloves garlic
  • 1-2 TBS olive oil
  • 1/8 cup pine nuts
  • sea salt & pepper
Slice the basil and mince the garlic. Mix in bowl with pine nuts, a little salt & pepper, and just enough olive oil to coat.


Pile the pesto mix onto the slices of bread and lightly drizzle a little more olive oil over all.

Bake for about 25 minutes at 350F.


You can eat this straight up or sprinkle with some Italian cheeses like Romano, Parmesan, and/or Asiago. I had a four cheese mix (with all of the previously mentioned cheeses plus Provolone).

Mmmmm!!

Thursday, July 20, 2006

Piña Colada Kabobas

My friend made kabobs for us when we visited her last weekend. I thought that would be a good thing to try myself, as we often get good deals on boneless skinless chicken breast, but it can grill up kind of tough and dry.

And sure enough, the very next time that we went grocery shopping after having the kabobs, there was a sale.

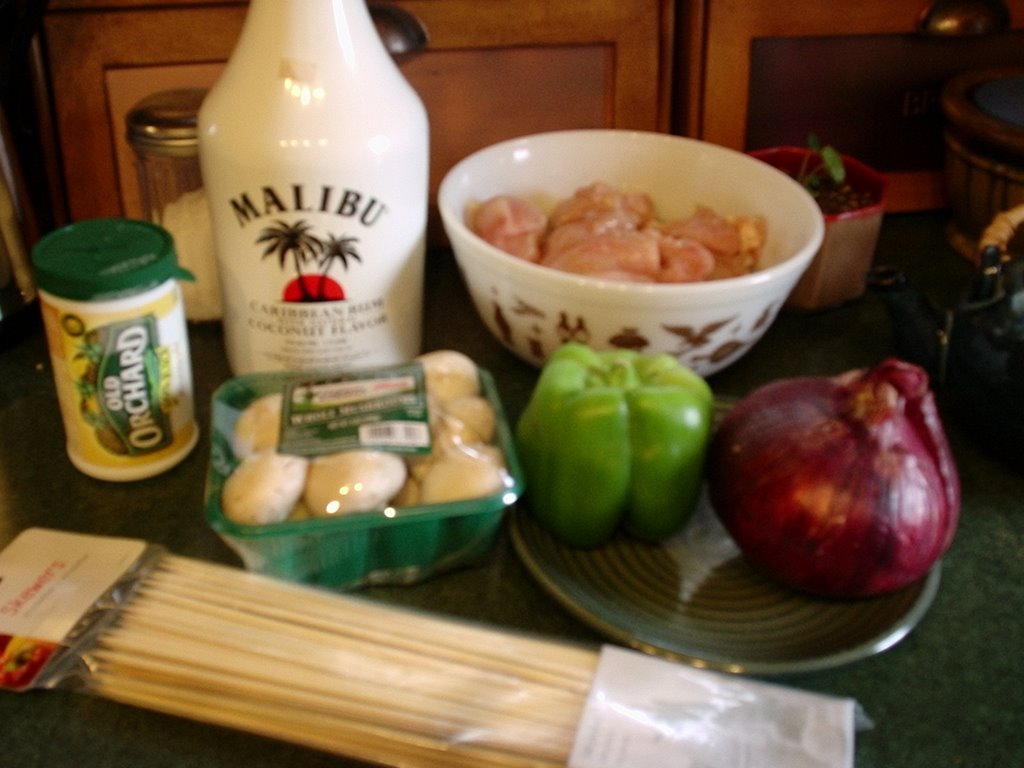
I was planning on doing the Marmarumalade marinade but, alas, the Captain was on vacation. But I did have a half bottle of Malibu (stop that snickering - it's good stuff!) so I decided to do a Piña Colada marinade.

Really simple:
  1. get a large bowl
  2. cut the chicken into skewerable pieces and place in the bowl
  3. pour the Malibu in until the chicken is covered half way
  4. pour thawed pineapple juice concentrate in until the chicken is covered
  5. let marinade for 20-30 minutes, stirring every so often


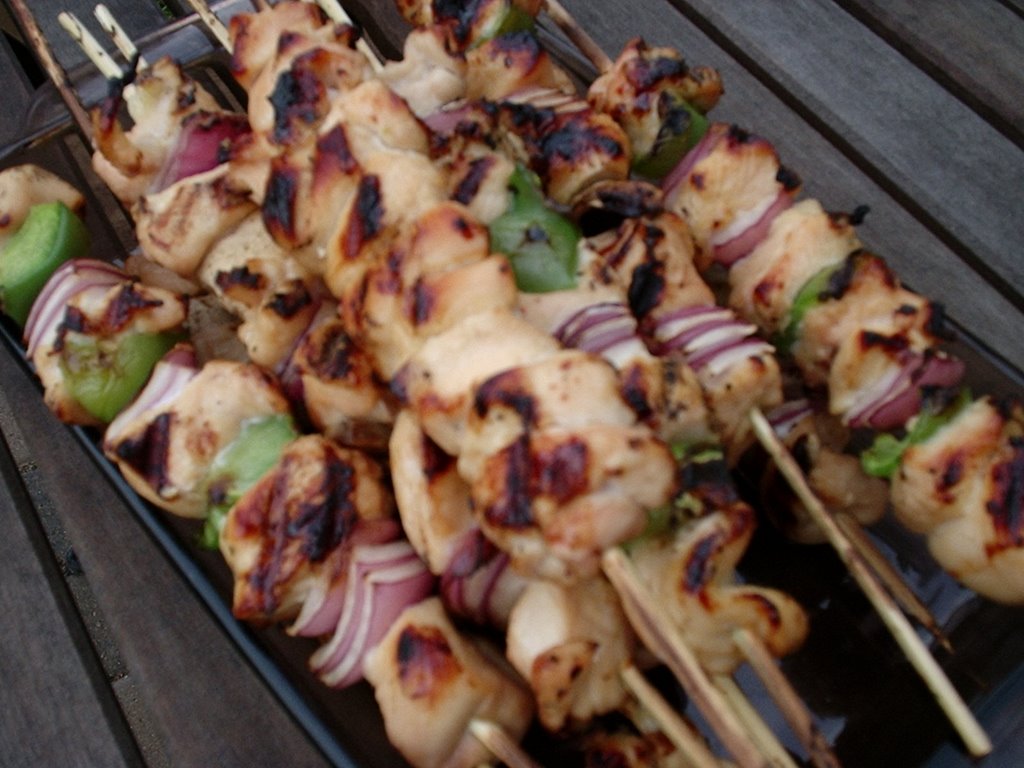
  6. skewer the chicken and selected veggies


  7. and then grill!


We did one package of chicken in the Piña Colada marinade and one package in an Asian pepper sauce marinade. The Piña Colada Kabobas were great hot, but weren't quite as good once they cooled off. The Asian Pepper Kabobs were good either hot or cooled. I think that the Piña Colada Kabobas could be better with a little tweaking - like maybe coating with grated coconut, using a little brown or demerara sugar, or adding a little cayenne pepper to the marinade.

Saturday, January 14, 2006

Mixed Veggie Pakoras

Mmmm... Indian food! Most Americans have made some Italian food, Mexican dishes, and possibly even tackled a French or Chinese dish or too - even if they were highly Americanized. But I don't know too many people that have tried Indian food, let alone tried to make it themselves.

So, when I got my new favorite cookbook, probably my favorite recipe book of all-time, I marked the pakoras on my list of recipes to try.

I made them last week, and as usual, I didn't have all the right ingredients, so I improvised. Maybe that is a talent.

Here's the recipe as is in the book:
  • 6 TBS gram(besan) flour
  • 1/2 tsp salt
  • 1 tsp chili powder
  • 1 tsp baking powder
  • 1-1/2 tsp white cumin seeds
  • 1 tsp pomegranate seeds
  • 1-1/4 cups water
  • 1 TBS finely chopped cilantro
  • your choice of vegetables
  • vegetable oil for frying
Well, I thought I had besan (gram flour), which is a flour made from chickpeas/garbanzo beans; but alas, I did not. SO, I took some dried chickpeas and ground them into a powder with my blender. Only realizing afterwards that taking canned chickpeas and grinding them up would have been much easier! Oh well, NEXT TIME!

First you add everything but the cilantro and vegetables. Using a grinding mixer (I used a hand mixer), blend until smooth. Instead of white cumin seeds, I used cheap-brand cumin and PLENTY of it! 1-1/2 tsp my ass! I used cayenne pepper for the chili. You can use any kind of chili pepper you want. Some pepper may be too distinct for this dish, but off hand none come to mind - so just use what you want. I also threw in extra gram and some regular flour because the batter was so soupy. I figured that the batter should have the consistency of onion ring batter.

I also threw in extra pomegranate seeds. This is my first run in with a pomegranate. Interesting fruit. I will have to find more uses for it. But it is SO expensive! I figured since I had gone through so much trouble getting the sucker open and really didn't know what else I would use it for, I should throw extra seeds into this recipe. I think I used about 3-4 TBS.

Once the batter is the way that you would like it, mix in the chopped cilantro. Once again, I threw in extra because I LOVE cilantro!!
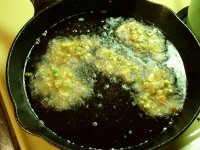
Start heating a few inches of oil in a heavy pan. The pakoras should be able to float. Or if you have a deep fryer you can use that too. I used peanut oil.

Once the oil is hot enough to fry, mix the vegetables of your choice into the batter. I would suggest using fresh vegetables. I used frozen mixed veggies with the beans, peas, corn, Lima beans, and carrots - but we all agreed that even though the pakoras were very good, they would have been great if I had used fresh veggies.

Cauliflower is a good one to use for this. I also chopped up potatoes and added this to the frozen mix veggies. That was really good. Just use what you like. I do have to say that this batter makes Lima beans delicious (well, probably as delicious as Lima beans can get anyway).

Using a slotted spoon, spoon the veggies out of the batter and into the hot oil. Be careful the oil isn't too hot or the batter will burn and the veggies won't cook. Turn the pakoras once they appear to have browned nicely on the underside. Fry the other side until it is also deep brown.
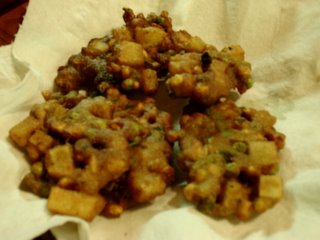
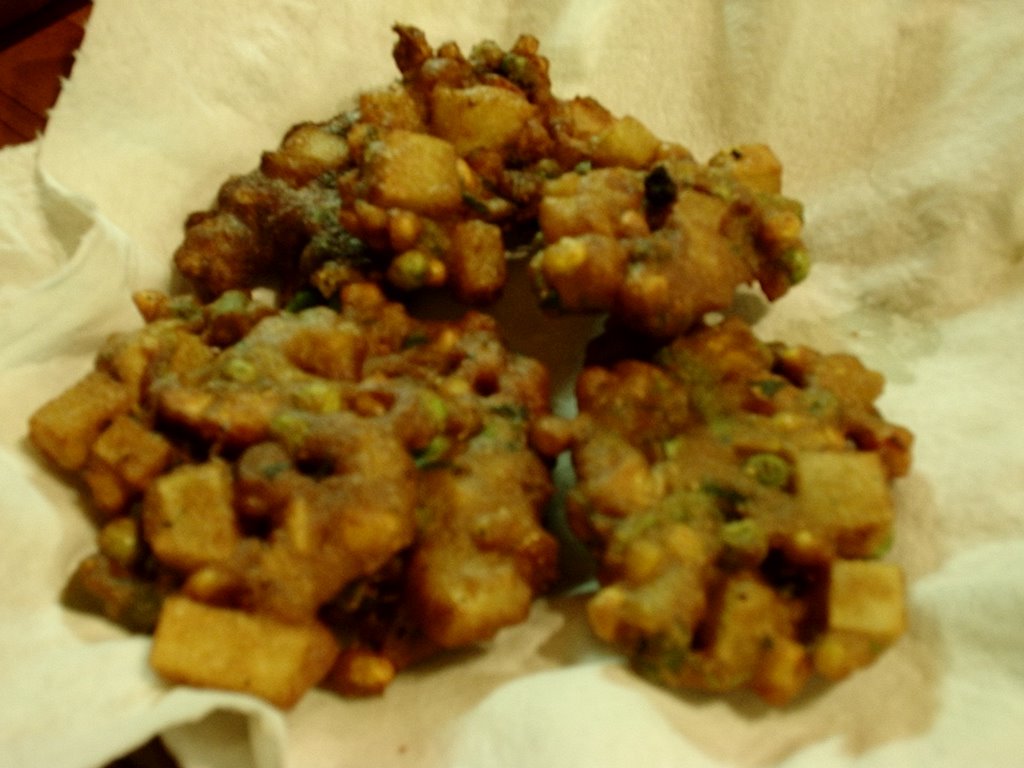
Using another slotted spoon, take the pakoras out of the oil and place onto a plate lined with a paper towel to drain the excess oils.

The finished pakora pictures didn't turn out that great, but the pakoras sure were tasty!

Serve these hot on their own or you could make a yogurt sauce for them. They are also very good reheated later.

Friday, August 19, 2005

Thyme and Zucchini Fritters

There's more to zucchini cuisine than bread. I have quite a few recipes for zucchini that I simply LOVE! And of course, I am always looking out for new ones to try. So when I bought the most amazing recipe book EVER!!! I decided I just had to try this easy Thyme and Zucchini Fritter recipe.

Of course, I almost always just use a recipe as a guideline, so the following is how I made them and will not exactly correspond with the recipe in the book.
  • 2 eggs
  • cup flour
  • 2 cups grated zucchini
  • baking soda
  • milk
  • thyme, fresh or dried
  • salt and pepper
In a medium sized bowl beat together two eggs into a scant cup of flour. When this is mixed thoroughly, sprinkle baking powder over the top of the batter, just enough to dust it. Mix this in as well. Mix in enough milk so that the batter will just barely run from your mixing utensil. This is about 1/4-1/3 cup. Mix in about 2-3 teaspoons of dried thyme. You can also use fresh if you were lucky enough to remember to grow it this year. Salt and pepper to your taste.

Cut the ends off the zucchini, and start grating.Wrap the grated zucchini in paper towel and squeeze out the moisture. Mix the grated zucchini into the batter.

You need a frying pan and some oil. I use a cast iron skillet. I love the way that cast iron cooks food. It just adds something extra to the food that I can't explain. It makes pancakes and hashbrowns perfectly.

Heat the pan first on medium heat. I learned years ago that the key to non-stick (save for those cancer causing teflon thingies) is cold oil on a hot pan. I don't really know if this is true, but what the hell. Do it anyway. I splurge on extra virgin olive oil. You only live once! Use a couple of tablespoons.

Once the oil is heated enough, scoop some of the batter into the pan and spread out slightly. You can put a couple of these in the pan at a time. I got three in at a time. Fry each side until they are golden brown and there is no more raw batter coming out the sides.

I served these warm with real mayonnaise. I did try them with Miracle Whip too, and that was good as well. I would have made my own garlic mayonnaise, but I was way too eager to try these while they were still warm and I hadn't thought to make it ahead of time.

The verdict? Nummy! I would definitely make these again.