Showing posts with label Cream. Show all posts

Monday, December 17, 2018

Vegetarian Swedish Meatballs

I was bringing Swedish meatballs to the potluck at work, and wanted to bring a vegetarian version as well. I really couldn't find a good one online, so as usual, I made one up.

I had a lot of trouble getting the flavor of the meatball the way I wanted it, I accidentally used twice as much black pepper than I intended, and I couldn't get a veggie brown sauce that didn't taste like bitter onion soup - so I almost scrapped the whole thing. However, after a few additions to the meatballs and an herb sauce in place of the brown sauce, they turned out great! I am planning to make bunches to freeze, and make Italian versions for spaghetti as well.


meatballs:
  • 8 oz cooked black eyed peas, drained and mashed
  • 1/2 onion, minced (can saute or leave raw)
  • 3 TBS olive oil or melted butter
  • 1/3 cup bulghur wheat, soaked overnight, drained
  • 1/3 cup oatmeal, cooked or soaked overnight in water, milk, yogurt, or sour cream
  • 1 tsp nutmeg
  • 1/4 tsp allspice
  • 1/2 tsp black pepper
  • 2 TBS soy sauce (Kikoman works very well for this)
  • 1 tsp thyme
  • 1 tsp garlic salt or adobo
  • 2 eggs
gravy:
  • 1 cup milk or cream
  • 1/4 cup flour
  • 1 tsp thyme, ground
  • 1 TBS parmesan/romano or Jarlsberg, shredded
  • 1 tsp garlic salt or adobo

Heat oven to 300F with a small pan of water on the lower rack.

Mix meatball ingredients together.
Form into 1" balls and place on a well oiled cookie sheet. (They are easier to roll if you cool the mix).
Drizzle or brush olive oil on the balls.
Bake for 30 mins. Make sure to keep the water pan filled as they bake.

Mix gravy ingredients in a medium sauce pan and bring to simmer.
Simmer until it thickens to the desired consistency.
If you are having trouble getting it thick enough, add a little more flour mixed in milk to the mixture, and simmer some more.

Serve the meatballs with just the sauce or over noodles.

Monday, December 3, 2018

Easy Creamy Truffles

I had about 8 pounds of a 10 pound bar of chocolate left over - what? I have reasons. Chocolate. Anyway, I needed to use it up, and I had a friend who made some truffles, so I thought that would be a good project -- try to find a recipe that was like Lindor Truffles - cause they are expensive!

I found a good truffle recipe on AllRecipes and just tweaked it a bit for my tastes. I really didn't need to do much to it - just added cream and cocoa powder to make them chocolatier and creamier.

And they are YUMMY! In fact, my husband said he preferred them to Lindor truffles! That's quite a compliment, because he would eat a whole bag of Lindors.

  • 8oz package cream cheese (any variety, low fat is ok)
  • 3 cups chocolate (semi-sweet chips, milk chocolate, white chocolate, even almond bark will work)
  • 1 1/2 to 2 cups powdered sugar
  • 1/3-1/2 cup cocoa powder (if you're making white chocolate truffles, omit this)
  • 1/4-1/2 cup cream (heavy, whipping, or even half-n-half; could try a coffee creamer substitute)
  • 1-2 tsp vanilla (or other flavoring)
Melt the chocolate in a double boiler or the microwave. Be careful to not cook the chocolate. Keep the heat on low so that the chocolate just melts.

Soften the cream cheese until smooth. I used an electric hand mixer.
Add the sugar, cocoa, cream and vanilla. Add the lowest amount and add more if necessary for texture and taste.
Mix until smooth and there are no streaks. The mix should pull away from the beaters fairly easily. If it is binding up the beaters, add more cream. If it is too runny, add more cocoa powder.

Add the melted chocolate using a rubber spatula (the mix will get a bit too thick for beaters)
Mix until smooth and there are no streaks. The mix should resemble a very soft, sticky cookie dough. If it is too dry/thick, add more cream and mix in well.

Let the mix rest in a cool place for an hour in the refrigerator or two hours in a cool room. It sets up faster if you flatten it out a bit.

Scoop out and roll into balls. You can use your hands or a melon baller coated with coconut oil.

If coating with chopped nuts, coconut, baking cocoa, or other toppings, roll in the topping immediately after rolling into a ball.
You can coat these in melted almond bark to get a nice, slightly crunchy outer coating that will hold toppings easier. Roll in the toppings immediately after dipping the truffle in the almond bark.

Let these set up on waxed paper. They will set up fairly quickly at room temperature.
Makes about 30 bite-sized truffles

**You can convert this recipe to fudge by substituting the cream and most of the sugar with a can of sweetened condensed milk. Mix the chopped nuts into the mix while it is soft and press the mix into a 9x13 pan coated with coconut oil.**

Wednesday, May 12, 2010

Morel Cream Sauce

I had my best morel year ever. My son and I usually just saute the mushrooms and eat them as a treat, but I actually had enough to make some kind of a dish with the morels that I found. I wanted to keep it simple and mild, since this was the first time that I was actually cooking them into a dish and wanted to be sure they would hold their own.

So, although I was going to do a stroganoff or an Alfredo, I opted for a simple cream sauce. I basically went out to my garden and pulled what was available.

  • 1 TBS olive oil
  • 1-2 TBS garlic chives, chopped - whites and greens
  • 1-2 TBS chives, chopped
  • Small leek, chopped - whites and tender greens
  • A few rosemary leaves, chopped (or a pinch of ground rosemary)
  • 1/3 cup (or more) morel mushrooms, chopped
  • 1-2 TBS flour
  • 1/2-1 cup cream or half-n-half - enough to get consistency you want
  • Sea salt
  • Pepper

Saute the chives and leeks.
Add mushrooms and saute until the mushrooms are fully cooked.
Sprinkle in the flour and mix well.
Pour in cream/half-n-half a little at a time and mix well. You want to dissolve all the flour into the liquids.
Add the salt and pepper and cook until thickened.

I used this over egg noodles. It was delicious!!

The sauce was mild enough that the three mushrooms I used easily held their own. If you want to add a little more spice, like thyme or convert it to a stroganoff by adding sour cream, or an Alfredo by adding some Parmesan; I would add more morels. Heck, if I had had them, I would have added more anyway :)

Sunday, October 25, 2009

Corn Chowder Acorn Squash

I had two acorn squash that I had to use up soon since I accidentally tore the stem off while harvesting - Oops! Oh well, my loss is my gain as I found some great recipes for this particular squash, and not your run of the mill "drizzle it in honey" recipes. In fact, I found two really interesting ones and couldn't decide, so I made them both!

The base recipe came from fredlet.
  • 1 acorn squash, cut in half lengthwise and seeded
  • 1 tablespoon olive oil
  • 1 cup half & half
  • 1 egg
  • 1 can sweet corn, drained
  • 1/3 cup grated Italian cheese (I used Romano and Asiago)
  • 2 shallots, minced
  • 1 sweet pepper, ripe (orange or red are great) chopped
  • 1/4 teaspoon garlic, minced
  • 1/4 teaspoon fine grain sea salt
1. Turn on your oven to 350F
2. Cut the acorn squash in half and scoop out the seeds with a spoon
3. Cook acorn squash cut side down in an oiled baking pan for 30 minutes.
5. Put the corn, shallots, garlic and sweet pepper in a frying pan (I used cast iron) over medium heat. You want to roast these ingredients. A little charring is ideal, just don't burn them.

Mix egg, half & half, cheese in a saucepan. Warm over low heat to melt the cheese.


Add the roasted mix and continue heating until the chowder thickens. Stuff the squash halves with as much of the chowder as they will hold.
Bake at 325F for 40-45 minutes.

The following are pictures of the squash before and after cooking.


The light one is the corn chowder squash (the dark is the other recipe I tried: Moroccan Stuffed Acorn Squash). This was definitely a great recipe. My son ate a half of one clean and I froze the other for a quick dinner later.

Sunday, February 15, 2009

Champagne Chicken

This is a great way to use up left over champagne from any celebration, mine was Valentine/anniversary weekend. I had this at a local Italian restaurant a couple of times and liked it enough to try to make it myself. I like mine better.

  • 3 large boneless skinless chicken breasts
  • 6-8 sprigs of fresh young rosemary
  • 6-8 cloves garlic (sliced)
  • 1/2 tsp dried sweet basil
  • 2 TBS butter
  • a little flour
  • 8oz fresh mushrooms
  • 2-3 TBS olive oil
  • 2-3 TBS butter (optional)
  • 1 - 2 cups champagne (I like Ballatore Gran Spumante)
  • 1/8 cup half-n-half
  • salt & pepper


Butterfly the chicken breast (slice the breast like a hot dog bun). Rub each chicken breast with a little sea salt. Stuff each breast with 2-3 sprigs of rosemary, a sprinkling of dried basil, a TBS or more of sliced garlic, and 1/2 TBS of sliced butter. Pepper each breast and refrigerate for at least an hour to allow all the spices to penetrate the meat. The longer you leave it, the more the meat will absorb the flavors. If you like, you can set the chicken in 1 cup champagne about 1/2 hour before cooking.

When ready to cook, heat a frying pan on medium heat. Add 2-3 TBS olive oil. Place the breast in the pan and dust with a little flour. Keep an eye on the heat; you don't want to burn the flour. Flip them carefully away from the cut side and dust the other side with flour. Once the one side is seared, flip again to sear the other side.

Push the chicken to the side of the pan and add the sliced mushrooms and the additional butter if desired. Once the mushrooms are seared, add the champagne - you can add the champagne that the chicken was sitting in as well.

Turn to low heat. Cover and let cook for about 5-10 minutes until the chicken is cooked through. Take the chicken from the pan. Turn the heat back to medium. Add the half-n-half to the pan. If you would like a thicker sauce, mix a little flour to the half-n-half before adding to the pan.

Serve the chicken topped with the sauce.

This, as I said, was delicious. The sauce had a tangy, almost bubbly zip. I served this with a cabbage salad and fried mashed potato patties.

Saturday, March 24, 2007

Digestive Quest

[Warning: this post is LONG! If you just want the final recipe go here]

While I was over in Scotland I became quite fond of the McVitie's Plain Chocolate Digestive Biscuits. I always had them with me on my travels. They made a great snack to get rid of hunger as well as keep me energized. They are extremely popular in Great Britain and Ireland. McVitie's is actually an Irish company. And coincidentally enough, on St. Patty's Day I found them in a store here.

World Market. One of the best stores ever. Love It! Love It! Love It!

We went there after catching a movie with some friends of SSB and myself. As I was walking up to my friend in the store, she showed me the package of McVitie's with chocolate and started to tell me I HAD TO GET THEM when I reached into my own basket and pulled out my own package! We both had a good laugh. SSB said it looked just like a commercial.

But they were fairly expensive too. $3.99 for a package of 18 biscuits. (I should point out at this time for those of you not in the know that biscuits in Great Britain/Ireland are actually cookies - not our biscuits). So I decided that I might just have to figure out how to make these myself. I mean, there's got to be a recipe for them SOMEWHERE on the internet, right?

Well, I found quite a few recipes for digestive biscuits, but I also found a lot of comments about how they weren't the same as McVitie's because those particular biscuits just couldn't be replicated at home. I was not discouraged. I figured that if I collected enough of the recipes, saw what they had in common and compared them to the ingredients on the package of the McVitie's that I had purchased, I might just be able to crack the code. I did some research on McVitie's digestives to find out how they were created, how they got their name, what makes them special, etc; to try and get some clues.

One clue that helped me in tweaking the recipes that I found was that they are called digestives due to the large amount of sodium bicarbonate in them that helps settle the stomach (and here I thought it was because of all the bran!). Most of the recipes that I found did not seem to have much baking soda in them at all.

I started with a recipe that I Frankensteined from several of the recipes that I had retrieved. I baked one biscuit at a time, recording the results and changes I made to the dough as I went along. The following is the unedited process of creating the biscuit I wanted:

Sy's first batch

INGREDIENTS:
3/4 cup whole wheat flour
1/4 cup all-purpose flour
1/2 teaspoon baking powder
1 tablespoon rolled oats
3 tablespoons butter
4 tablespoons brown sugar
1 tablespoons Crisco
1/4 teaspoon vanilla

DIRECTIONS:
Preheat oven to 375 degrees F (190 degrees C). Grease cookie sheets.
In a large bowl, mix together the flour, baking powder, and oats with a pastry blender. Mix in sugar with a pastry blender. Throroughly mix in vanilla, then add fats. Mix these in with a pastry blender until the mix is uniform.
Knead dough on a floured surface until smooth. Roll out dough to
approximately 1/8" thickness. Cut into rounds with cookie cutter about
2 1/2 inches in diameter. Transfer to cookie sheets and prick with a
fork. Bake 15 to 18 minutes, or until golden. Let cool on wire rack.
Store in an airtight tin.

THINGS I WOULD CHANGE:
I would cut back on the sugar by about half.
I did add two singles of half-n-half after trying one biscuit. This made the biscuit a little less grainy. I think I would try adding more to see if I could get them fluffier this way too. I found a soda cracker recipe that calls for quite a bit of liquid. Maybe replace 1 TBS of the butter for liquids.
The McVitie's biscuits use palm oil - I would try that. It seems that there is a slightly bitter taste to the McVitie's that you can't get with this recipe and I think that it is the palm oil.
I tried chilling some of the dough before rolling and cutting. This really didn't seem to make too much of a difference in the final product, but it did make the dough easier to handle.
This recipe uses oats, but McVitie's does not contain any so I would substitute some wheat product for the oats.
They also need to be fluffier, so I might try adding a bit more baking powder - this would also add a little of that bitterness that I am looking for.
I also reduced the heat to 350F which got rid of the uneven browning that I got in the first batch.
I also did all the biscuits, after the first one, on the baking stone instead of a cookie sheet. I think this was a good move.

INGREDIENTS IN MCVITIE'S:
wheat flour, plain chocolate (29%), sugar, cocoa mass, palm oil, butter oil, cocoa butter, emulsifiers (soya lechithin, polyglycerol, polyricinoleic acid), natural flavor (vanilla), palm oil, wholemeal, sugar, glucose fructose syrup, raising agents (sodium bicarbonate, tartaric acid, malic acid), salt.


plain chocolate = bakers chocolate
sugar = dark brown sugar
cocoa mass = the precursor to cocoa powder
emulsifiers = things like egg yolks and lecithin - they hold the crumb together and give the biscuit greater shelf life
wholemeal = whole wheat flour
glucose fructose sugar = corn syrup
raising agents = baking soda, precursor to cream of tartar (it's a byproduct of wine), found in apples (makes things sour)


Sy's 2nd batch:
I halved the sugar and subtracted 1 TBS butter.
I added 1 TBS milk powder and 1/3 cup water
Along with the 1/2 tsp baking powder I added a 1/2 tsp baking soda as these biscuits are said to be known for their high content of baking soda - hence the name "digestive".
I substituted wheat bran for the oats as the original biscuits have no oat in them.

My first biscuit came out too chewy and blonde.
I added another TBS of both butter and sugar.
I also added a bit more wholemeal flour and baked another cookie.

The biscuit was still too sconey, so I added another TBS each of butter and sugar. I also raised the temp of the oven to 360-370F.

This batch was kind of turning into a train wreck, so I set it aside and started a new batch.


Sy's third batch:
I went back to the original recipe.
I realized after I mixed this third batch that I had added WAY too much wheat bran. It was supposed to be 1 TBS to replace the oats and I put in 1/4 cup. OOPS!! I think that this won't be so bad since oats puff up so much and wheat bran doesn't nearly so much.
I also added 1/4 tsp baking soda and 1/4 tsp cream of tartar (since the McVitie's use tartaric acid).
I also used 4 half-n-half singles this time.

After the first biscuit I added another TBS each of butter and sugar to make up for the extra bran.
I also turned the heat back down to 350F since I was getting the extra browning around the edges again.


OH WAIT!!
That batch that I thought was a goner - the last biscuit that I got from it was actually REALLY CLOSE!!!
It just needed a bit more sugar and butter! WhooHoo!
So I went back to that dough, added 1 TBS of each and baked another biscuit.
I think baking these a little longer than 15 mins at 350F might also make them crispier - so I tried that too.

Actually, on second thought, I should have only added the butter - but c'est la vie! That's why I wrote down each step of this process.

In the end, I came 90% close to a perfect match with the third batch with all the extra changes. But the second batch with the final changes was pretty good too.

I have now been baking for over 6 hours, but not bad for cracking a mystery code of ingredients for such a sought after delicacy!


Once I had the biscuits I wanted, I baked the rest of them and coated the backs of them with melted semi-sweet chocolate chips. YUMMY! I, my family, and the neighbor kids highly approved!

The finally winning recipe is as follows:

INGREDIENTS:
3/4 cup whole wheat flour
1/4 cup all-purpose flour
1/2 teaspoon baking powder
1/4 baking soda
1/4 cream of tartar
1/4 cup wheat bran
4 tablespoons butter
5 tablespoons brown sugar
1 tablespoons Crisco
1/2 teaspoon vanilla
4 half-n-half singles (little more than 3 TBS half-n-half)

DIRECTIONS:
Preheat oven to 350F.
In a large bowl, mix together the flours, bran, baking powder, baking soda, and cream of tartar with a pastry blender. Mix in sugar with the pastry blender. Mix in fats with the pastry blender. The mix at this point should be crumbly and uniform. Mix the vanilla in the half-n-half and add to the mix. Mix with pastry blender until it is uniform and resembles really soft playdoh.

You can at this point refrigerate for 20 minutes to make the dough easier to handle, but it is not necessary. Be sure to roll out dough between two pieces of waxed paper! Roll to approximately 1/8" thickness. Cut into rounds with cookie cutter about 2 1/2 inches in diameter (I used the ring off one of my canning jars).

Transfer to cookie sheets and prick with a fork. Bake 15 to 18 minutes (adjust the baking time up to dry them out more if the biscuits are too soft and fluffy), or until golden. Let cool on wire rack.

Optional: spread the backs of the cooled biscuits with melted semi-sweet chocolate (as in chips - almost everyone has these for chocolate chip cookies). Set the biscuits chocolate side up on the rack until chocolate hardens.


Store in an airtight tin -if storage is even necessary! They will go fast!

Tuesday, March 20, 2007

Turkey Madeira

We were having a slow day at work so the girls were leafing through our recipe magazines for dinner ideas. Blue saw this recipe in the slow-cooker magazine and rushed it back to my desk. And she was right to do so, because it certainly looked intriguing.

I had just purchased asparagus (what luck), but had to go to the store after work for the turkey breasts and mushrooms. It wasn't until I got home and was getting ready to make it that I realized that the reason that it is called "Turkey Madeira" is because it is made with Madeira wine. I had no idea what Madeira wine was, much less did I have it. A little research was called for.

Turns out that Madeira wine is from a place called Madeira, an island situated in the Atlantic Ocean north of the Canary Islands. During the shipping/exploration age it was THE place to stop before heading out for a long voyage to The Far East. They produced a fortified wine (wine mixed with a stronger alcohol, such as brandy, for longer and easier storage) which initially was considered average, but on a fluke, a ship returned to Madeira after crossing the ocean twice with a good amount of the wine still on board. The wine had drastically improved in flavor. They began experimenting with the aging of the wine, trying to replicate the heat, humidity, and motion of the travel on a ship. Before refrigeration, it was the most popular wine - because it does not have to be refrigerated after opening! It can last up to a year without refrigeration after opening. MY KIND OF WINE!!

So, turns out that I really did need to get this wine. I was very lucky that my liquor store had this wine in stock - and one actually from the island of Madeira!! SCORE!!

I rushed home with my treasure and prepared to make this dish. First I opened the bottle of Madeira and had a healthy sip. YUM! It's a tiny bit dry but sweet with layers of spiciness. It's like the Coke of wines. I reiterate: MY KIND OF WINE!

  • 1/2 cup Madeira wine (1/4 more than the recipe asked for - it is good wine!)
  • 1/2 cup chicken broth (I used 1 bouillon cube dissolved in 1/2 cup hot water)
  • 1 cup sliced crimini mushrooms (the recipe called for porcini, but I couldn't find any and our local co-op has some very nice baby bellas)
  • 1 medium chopped sweet onion (the recipe called for thinly sliced onion, which would have been terrific; but I had accidentally chopped my last onion before I noticed the words "thinly sliced")
  • 2 lbs boneless, skinless turkey breast
  • 3-4 TBS parsley
  • 1/2 cup half-n-half
  • 8 spears fresh asparagus
  • corn starch or flour

Mix the wine, mushrooms, onion, and broth. Slice the turkey breast into 1" strips, placed them in the bottom of a crock pot, and pour the wine mix over the top. Set this on low and left it cook for about 5 hours.

Mix parsley and half-n-half (again, I used the singles since that is what I had) and mix it into the crock pot. Then chop asparagus and throw that into the crock pot. Let it cook an hour or so more.

If you want a thicker sauce, scoop out the turkey and asparagus into a serving bowl, pour the liquids into a sauce pan, added a little cornstarch mixed with water (or you could use flour) and heat it until it thickens.

I made my own noodles for this with flour, salt, water and oil. It was my first time making noodles and I'm not sure that I would make them again - but my family like them.


Here is a picture without and with the gravy.

Generally, I was expecting this dish to have more flavor. It was good, but not really a WOW. It is classic Midwest cooking. I would add more wine next time - maybe even marinade the turkey in it. But as it is a fairly good crock-pot recipe, it deserves a place in the rotation.

Thursday, March 15, 2007

Spinach Pesto Quiche

There was a sale on eggs and I suddenly had the flavor of fluffy eggs, bacon and basil with a light, buttery pastry in my mouth.

QUICHE!!

I have only made quiche once; and although it wasn't terrible, it wasn't the best.
But this time, it was AWESOME!!!

The Pastry
Start with the pastry. It is very important that the butter be cold and that you do not over mix. The thing that makes the pastry flaky is the tiny bits of un-mixed butter melting and expanding, leaving air pockets.
  • 1 cup flour
  • 1/4 tsp salt
  • 1 stick COLD butter
  • 1 egg yolk
  • 2 tbs ICE COLD water
Mix the salt and flour well. Cut the butter into the flour until just crumbly. Whisk the egg yolk and water and mix lightly into the flour mix. DO NOT OVER-MIX! Just mix it until everything is incorporated. Some recipes will have you roll it out at this point, but then you risk over-working the dough. I just pushed it into the bottom of the pan in which I was baking the quiche until it was evenly distributed across the bottom and sides.

Bake it slightly at 425F before putting in the filling.

The Filling
  • 4 eggs
  • 2 cups light cream (the only cream that I had was half-and-half singles - the kind that you use for coffee. 48 of them equals 2 cups :)
  • 1/2 tsp salt
  • 1/2 cup cheese (usually, you would use Swiss - for this I used my four Italian cheese mix)
  • 2-3 tablespoons minced sweet onion
  • 1-2 tablespoon minced garlic
  • 1 cup chopped, raw spinach (I probably used more than this)
  • 1/2 cup chopped fresh basil (and I probably used more than this too)
  • 1/4 cup pine nuts
  • 1/4-1/2 cup sliced mushrooms
  • Pinch of cayenne pepper
Saute the onion, garlic and pine nuts. Whip the eggs and cream. Mix in all other ingredients, as well as the sauteed ingredients. Pour into the lightly browned pastry crust and bake in a 425F oven for 15 minutes. Lower the heat to 350F and bake for another 30 - 45 minutes until a knife comes out clean.

This was even great as left overs!

Sunday, April 30, 2006

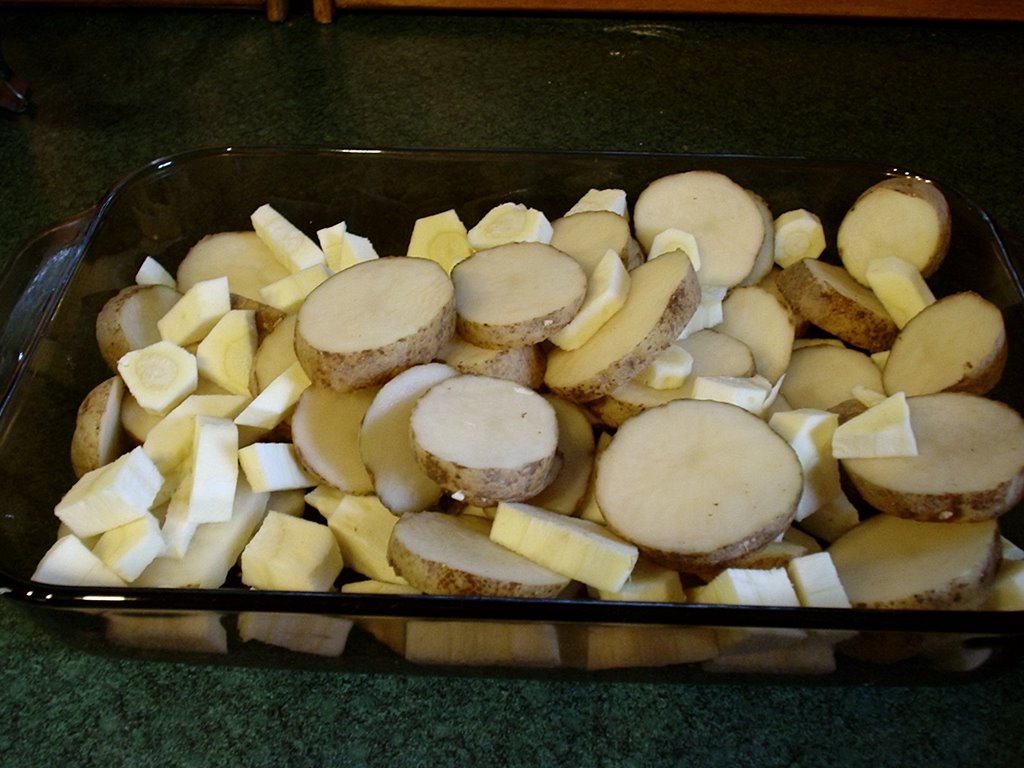
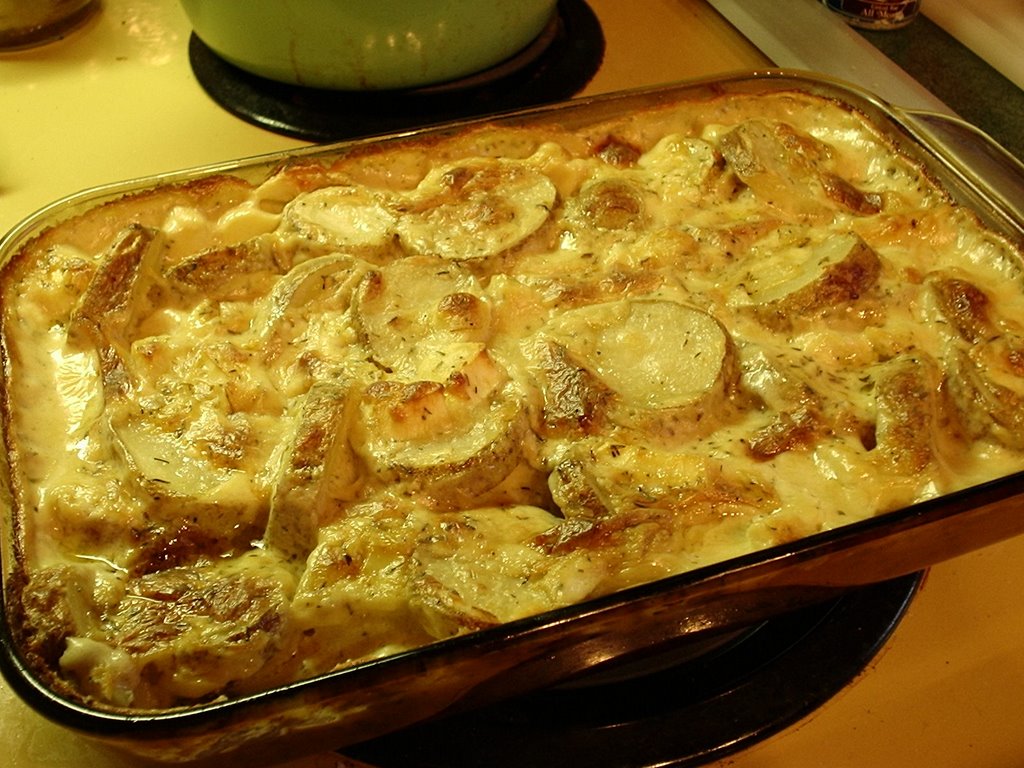
Potatoes and Parsnips in Four Cheese Herb Sauce

OH.MY.GOSH!!

I made the most delicious sauce today!
Seriously, I almost cried.

  • 1 sweet onion, chopped
  • 3 cloves garlic, minced
  • 4 medium potatoes, sliced
  • 2 parsnips, chopped
  • 2 TBS olive oil
  • 3 TBS butter
  • 1/8-1/4 cup flour
  • 1 pint half-n-half
  • 2 TBS thyme
  • 2 TBS Italian four cheese mix
  • salt & pepper


Saute the onion in olive oil over medium heat. When the onion is about half cooked, add garlic. Add butter, be careful to monitor heat so that the butter melts but doesn't burn. Once it is melted, mix in enough flour to make a paste. Mix in half and half, thyme, four cheese mix and sea salt and pepper.

O.M.G!! It was YUMMMMMY!!! I wanted to eat it right then.

Place potatoes and parsnips in a baking dish. Pour the sauce over the potatoes and parsnips mixed it in, and bake the whole thing at 350F for an hour.

It was delicious!! I will definitely make this again. My son and husband weren't so sure about the parsnips (although they each had two huge servings), so I may omit them in the future. I think they just weren't expecting them.

In any case, I definitely have big plans for that sauce!

Monday, March 6, 2006

Cream of Cauliflower Soup

I love cream-of soups. They are my favorites. But I have had so much trouble finding a good recipe for them. I have tried many different ones over the years without much luck.

But if at first you don't succeed -- try, try again.

I had some left over cauliflower and half-n-half and some determination, so I decided to make cream of cauliflower soup.

I found recipes for cream of mushroom and cream of celery so I took some ideas from them and then just had to wing it. I've made lots of from-scratch pudding and thought the base for the soup would be very much like that.

  • 1/2 head cauliflower
  • 1 thick slice sweet onion
  • 2 TBS butter
  • 3 chicken bouillon cubes
  • 1/8 cup flour
  • 1/8 cup Swiss cheese - chopped or grated
  • 2 cups half-n-half
  • 2-1/2 cups water
  • 1 egg - mixed well

Chop up cauliflower and throw into a sauce pan with 1/2 cup water. Cook on medium heat.

Finely chop one thick slice of sweet onion. I love the Andes sweets, or, if you can get it, my all time favorite is Vidalia! Throw the chopped onion in with the cauliflower along with two tablespoons butter.

When the cauliflower is just about cooked through and the water has boiled down, throw in bouillon cubes. Sprinkle flour over the cauliflower and mix in.

Turn down the heat and pour in half-n-half, rest of water, and egg. When the soup has heated up, add Swiss cheese. Cook until thicken.

Once the cream has been added, DO NOT OVER HEAT!!!

This was the best cream-of soup that I have ever made. I would definitely make this again, and I plan to try other versions, like: mushroom, broccoli, potato... OH! I CAN'T WAIT!!