Tuesday, October 31, 2006

Creamy Italian Chicken Soup


This is another of my invented recipes. Despite the name, this has no dairy in it. The creaminess comes from throwing the broth into a blender.

  • 1lb boneless, skinless chicken breast, cubed
  • 32oz stewed tomatoes
  • 1/16 cup Italian seasoning
  • 1 tsp basil
  • 1 tsp oregano
  • 3 cloves garlic, chopped
  • 2 tsp sea salt
  • dusting of cayenne pepper
  • 1 sweet onion, chopped and carmelized
  • 4 carrots, chopped

Put everything but the carrots in a crock pot and cook on high for about an hour.

Separate the chicken from the broth. Place the broth, chunks and all, into a blender and "liquify" for a minute or so until smooth.

Throw everything back into the crock pot with carrots.

Let this cook on low for another few hours.

When we got home and were hungry cause it smelled SOOO GOOD!! Although the picture doesn't show it, I did cook up some egg noodles to add shortly before serving. This soup was a big hit with my family. My son ate almost all of it!

Monday, September 11, 2006

Pesto Bread

I was at a kiln firing party this weekend. Someone brought some wonderful toasted bread topped with pesto. I loved it so much that I decided I had to try to figure out how to make it.

It was actually quite easy.
  • 1 loaf Italian or French bread sliced into 1/4-1/2 slices
  • 3-4 cups fresh basil
  • 5 cloves garlic
  • 1-2 TBS olive oil
  • 1/8 cup pine nuts
  • sea salt & pepper
Slice the basil and mince the garlic. Mix in bowl with pine nuts, a little salt & pepper, and just enough olive oil to coat.


Pile the pesto mix onto the slices of bread and lightly drizzle a little more olive oil over all.

Bake for about 25 minutes at 350F.


You can eat this straight up or sprinkle with some Italian cheeses like Romano, Parmesan, and/or Asiago. I had a four cheese mix (with all of the previously mentioned cheeses plus Provolone).

Mmmmm!!

Thursday, July 20, 2006

Piña Colada Kabobas

My friend made kabobs for us when we visited her last weekend. I thought that would be a good thing to try myself, as we often get good deals on boneless skinless chicken breast, but it can grill up kind of tough and dry.

And sure enough, the very next time that we went grocery shopping after having the kabobs, there was a sale.

I was planning on doing the Marmarumalade marinade but, alas, the Captain was on vacation. But I did have a half bottle of Malibu (stop that snickering - it's good stuff!) so I decided to do a Piña Colada marinade.

Really simple:
  1. get a large bowl
  2. cut the chicken into skewerable pieces and place in the bowl
  3. pour the Malibu in until the chicken is covered half way
  4. pour thawed pineapple juice concentrate in until the chicken is covered
  5. let marinade for 20-30 minutes, stirring every so often


  6. skewer the chicken and selected veggies


  7. and then grill!


We did one package of chicken in the Piña Colada marinade and one package in an Asian pepper sauce marinade. The Piña Colada Kabobas were great hot, but weren't quite as good once they cooled off. The Asian Pepper Kabobs were good either hot or cooled. I think that the Piña Colada Kabobas could be better with a little tweaking - like maybe coating with grated coconut, using a little brown or demerara sugar, or adding a little cayenne pepper to the marinade.

Sunday, April 30, 2006

Potatoes and Parsnips in Four Cheese Herb Sauce

OH.MY.GOSH!!

I made the most delicious sauce today!
Seriously, I almost cried.

  • 1 sweet onion, chopped
  • 3 cloves garlic, minced
  • 4 medium potatoes, sliced
  • 2 parsnips, chopped
  • 2 TBS olive oil
  • 3 TBS butter
  • 1/8-1/4 cup flour
  • 1 pint half-n-half
  • 2 TBS thyme
  • 2 TBS Italian four cheese mix
  • salt & pepper


Saute the onion in olive oil over medium heat. When the onion is about half cooked, add garlic. Add butter, be careful to monitor heat so that the butter melts but doesn't burn. Once it is melted, mix in enough flour to make a paste. Mix in half and half, thyme, four cheese mix and sea salt and pepper.

O.M.G!! It was YUMMMMMY!!! I wanted to eat it right then.

Place potatoes and parsnips in a baking dish. Pour the sauce over the potatoes and parsnips mixed it in, and bake the whole thing at 350F for an hour.

It was delicious!! I will definitely make this again. My son and husband weren't so sure about the parsnips (although they each had two huge servings), so I may omit them in the future. I think they just weren't expecting them.

In any case, I definitely have big plans for that sauce!

Grilled Salmon


  • Salmon fillet
  • Sea salt
  • Pepper
  • Red wine (cabernet shiraz),
  • Sprinkling of cayenne pepper
While the grill is heating up, pour the wine over the fish and sprinkle the salt and peppers on the fish. Let set until grill is hot.


I have never grilled fish before, and I thought that the fish would get flaky and fall through the grill. So initially I had covered the grill in tinfoil. That didn't seem to work well for flipping the fish, so I tore it off. And you know what? The fish never stuck or started to fall apart - it was beautiful.

I grilled them on both sides until the fish was opaque all the way through. I think it was less than twenty, maybe less than fifteen, minutes total grilling time.

They were delicious! I had a small piece and my husband had a piece, and my son ate this whole plateful that you see here in the picture. He said it was the best fish that he had ever eaten. I would make this again.

Thursday, March 30, 2006

Northern Pike in a Caper Sauce

I got some northern pike on sale last week and wanted something quick for dinner tonight, so pike it was.

Northern pike is a fairly common, mild-flavored, predator fish from where I grew up. It has a loose skeletal structure which makes it very difficult to get completely bone-free. But this was professionally filleted, so I was good to go.

I actually took the recipe from the package the fish came in (but of course I made a few changes). It had capers in it and I had bought a jar of capers months ago, but didn't have any recipes to use them in. Mmmm... capers!!!

  • 2 cloves garlic
  • 2 TBS olive oil
  • 1 small tomato
  • 1-2 TBS butter
  • 1-2 TBS wine or sherry
  • 2 TBS basil
  • 2 TBS lemon juice
  • 3 TBS capers
  • 2 TBS Italian four cheese mix
  • salt & pepper

Mince garlic and saute in olive oil. Chop up tomato and throw in the pan with the garlic. Throw wine (I actually used sherry), basil, capers and butter. Cook until the butter is melted. Salt and pepper to taste.

I used my clay pot cooker for the fish. It works great for fish too! I put a little olive oil in the bottom of the pot, But I don't think this was necessary. I put the fish fillets in frozen and poured the lemon juice and the caper sauce over the top. I sprinkled on the Italian four cheese mix and baked this for 20 minutes at 500F.

It was DELICIOUS!!!! This is going on my favorites list. And now I have a recipe to use up those capers on. Mmmm... capers!!

Tuesday, March 7, 2006

Lasagna Bake

I had a bunch of ingredients that needed to be used up: mozzarella, cottage cheese, sweet onion, and unflavored yogurt. Hmmm... what could I make?

Lasagna bake!!!

What's that? What about the yogurt? Trust me.

First, turn the oven on to 350F and grease a lasagna pan well with olive oil.
  • 1 lb mini lasagna noodles
  • 1/2 lb shredded mozzarella
  • 1/2 lb cottage cheese
  • 1/3 lb plain yogurt
  • 1 lb ground turkey
  • 1/2 sweet onion
  • 1 jar/can favorite spaghetti sauce
  • 1 TBS garlic salt
  • 2 cup shredded mozzarella for topping
  • Parmesan
Par-cook the noodles and mix with the mozzarella, cottage cheese, and yogurt.

Then mix in the spaghetti sauce and ground turkey sauteed with sweet onions, garlic salt, and top with shredded mozzarella and parmesan.

Bake for about an hour at 350F.

How was it?
DEEE-LICIOUS!!

Monday, March 6, 2006

Cream of Cauliflower Soup

I love cream-of soups. They are my favorites. But I have had so much trouble finding a good recipe for them. I have tried many different ones over the years without much luck.

But if at first you don't succeed -- try, try again.

I had some left over cauliflower and half-n-half and some determination, so I decided to make cream of cauliflower soup.

I found recipes for cream of mushroom and cream of celery so I took some ideas from them and then just had to wing it. I've made lots of from-scratch pudding and thought the base for the soup would be very much like that.

  • 1/2 head cauliflower
  • 1 thick slice sweet onion
  • 2 TBS butter
  • 3 chicken bouillon cubes
  • 1/8 cup flour
  • 1/8 cup Swiss cheese - chopped or grated
  • 2 cups half-n-half
  • 2-1/2 cups water
  • 1 egg - mixed well

Chop up cauliflower and throw into a sauce pan with 1/2 cup water. Cook on medium heat.

Finely chop one thick slice of sweet onion. I love the Andes sweets, or, if you can get it, my all time favorite is Vidalia! Throw the chopped onion in with the cauliflower along with two tablespoons butter.

When the cauliflower is just about cooked through and the water has boiled down, throw in bouillon cubes. Sprinkle flour over the cauliflower and mix in.

Turn down the heat and pour in half-n-half, rest of water, and egg. When the soup has heated up, add Swiss cheese. Cook until thicken.

Once the cream has been added, DO NOT OVER HEAT!!!

This was the best cream-of soup that I have ever made. I would definitely make this again, and I plan to try other versions, like: mushroom, broccoli, potato... OH! I CAN'T WAIT!!

Thursday, February 16, 2006

Traditional Manicotti

I got this recipe from the 1000 Vegetarian Recipe book. I'm telling you, I LOVE that book!!

2 heaping cups of cottage cheese (it was supposed to be ricotta, but I had to substitute cottage cheese + romano)
1/4 cup Romano (see, I told you)
3/4 a package of frozen spinach
1 cup chopped mixed sweet peppers
3 chopped scallions.

This is what it looks like all mixed up. I also added some salt and pepper.

This recipe is actually called "Traditional Canelloni" in the book, but I didn't have canelloni, I had manicotti. Hey, it's all just pasta.

Cook the pasta most of the way. Drain and run cold water over it to cool it down enough to handle it, because you have to stuff them.

The book showed someone using a spoon to stuff the pasta, but good luck with that. I used my hands. We evolved them for a reason, you know.

Here is Neo asking if he can have some yet. Doesn't it look like you could just stuff him in one of the manicotti?

Awe! What a cutie!!

But NO!! You can't have any!

Put the stuffed pasta in a grease baking dish. Pour pasta sauce over the top. I made my own with tomatoes I canned from my own garden, but you can use what you want. The sauce should just about cover the pasta.

Sprinkle romano and parmesan on top and cook in for 30-40 minutes at 375 F; or until the pasta is completely cooked and the cheese on top is browned.
Mine didn't quite make it to the browned stage since my son kept hounding me about when it would be done.

Like every five minutes!!

It was pretty good. Well, I'll say it has great potential. I would definitely try this again, with a couple of changes...

Changes I would make:
* Cook it longer.
* Use thicker sauce. I did not spend a lot of time making sure the sauce was right before I used it and I added extra water to it because I didn't have enough to cover the pasta sufficiently.
* MORE CHEESE!!! Hey, I'm from Wisconsin! Maybe a little mozzarella grated on top. Yummy!!

Sunday, February 12, 2006

Marmarumalade Chicken

Today I was inspired by the large quantities of clemetines that were left over from when I had a cold and the marmalade that I made with some of them for my son the other day. I thought the marmalade would go very well with chicken, so I devised a recipe to bring the two together.


  • 1 whole chicken
  • 8 clementine sliced thinly
  • 1/4 cup lemon juice or 1 thinly sliced lemon
  • 1/4 cup brown sugar
  • 2 cups spiced rum
  • 2-3 TBS cilantro - fresh or dried
  • 2/3 of a can of apple/passion/mango juice concentrate

  • In a large bowl, mix everything but the chicken. Place the chicken in this marmarumalade(by the way, my clever husband came up with that name. I like to name my dishes fun names, and I think that name fit well). Marinade for about 20 minutes. Flip the chicken over and marinade for another 20 minutes.

    Then it was into my clay pot cooker. I stuffed the chicken with the sliced clemetines and poured the marinade into the cooker.

    I let it cook in a 450 degree oven for about an hour and twenty minutes.

    It came out a little crispier than I had intended but the clay pot cooker did its job of keeping the chicken moist, and it was DELICIOUS!!


    I would definitely make this again!

    Thursday, February 2, 2006

    Coronation Chicken Salad

    Coronation Chicken was invented by Constance Spry who wanted to serve something new and special for the Queen's Coronation lunch in 1953.

    I learned about it while in Scotland. I was getting lunch from at the Dalkieth Palace (where I was taking classes). Along with various cold cuts and cheese was a dish of something that I could not classify. I asked the chef and he told me all about Coronation Chicken.

    Always up for something new, I took some. I was the only one who did. But that just left more for me. It was DELICIOUS!!

    Today, I came home for lunch with not much time to eat. I decided to see if I could recreated Coronation Chicken. I think I did pretty well. Of course, my recipe is a highly simplified version of the real thing; but it tasted fab anyway. And who doesn't like easy?

    • canned chicken (drained)
    • mayonaise to desired consistancy
    • curry powder to taste
    • chopped nuts (I used pecans, because I LOVE pecans!)

    Mix it all up and pile on bread for a sandwich, or you could just eat it plain.
    Yummy!!

    Sunday, January 15, 2006

    Chicken Sum'n Sum'n

    I was asking my husband what he wanted for dinner. He said that he didn't know. I said that I could make chicken... er, sum'n sum'n. He laughed and said that I should actually come up with a recipe and call it that.

    So I did! And now you too can make chicken sum'n sum'n.

    • 1 whole chicken
    • 1/2 bottle wine
    • 1/4 cup hoisin sauce
    • 3-4 TBS thyme
    • 1 tsp celery seeds
    • 1-1/2 TBS sea salt
    • 4 TBS pomegranate arils
    • 1 medium sweet onion
    • 1 tsp ground rosemary


    In a stain-free bowl, mix wine, hoisin, thyme, celery seeds, and 1 TBS sea salt. Marinade the whole chicken in this mix for at least an hour.


    Place the marinaded chicken in your chicken pan of choice. I used the clay pot cooker, but you could use regular pan or a dutch oven. In a non-clay cooker, I would suggest adding about 1 inch of the marinade to the bottom of the pan to keep the chicken from going dry.

    Sprinkle 1 tsp sea salt, 1 tsp ground rosemary over the chicken. Add pomegranate arils and a onion cut into 2 inch pieces into the pan around the chicken.

    In the clay pot cooker, I cooked it for two hours at 450F. I'm not sure what it would be in a regular pan: 1-2 hours on 350F? I would cover with tin-foil for first hour if in a regular pan, and then crisp the skin for twenty minutes without tin foil.

    When cooked in the clay cooker it is so tender that you can use a fork to get meat off the chicken.

    I served this chicken with garlic & rosemary mashed potatoes and a salad made with red lettuce, chopped pecans and the rest of the pomegranate's arils with a fat free honey dijon dressing. Oh Joy!!

    Saturday, January 14, 2006

    Mixed Veggie Pakoras

    Mmmm... Indian food! Most Americans have made some Italian food, Mexican dishes, and possibly even tackled a French or Chinese dish or too - even if they were highly Americanized. But I don't know too many people that have tried Indian food, let alone tried to make it themselves.

    So, when I got my new favorite cookbook, probably my favorite recipe book of all-time, I marked the pakoras on my list of recipes to try.

    I made them last week, and as usual, I didn't have all the right ingredients, so I improvised. Maybe that is a talent.

    Here's the recipe as is in the book:
    • 6 TBS gram(besan) flour
    • 1/2 tsp salt
    • 1 tsp chili powder
    • 1 tsp baking powder
    • 1-1/2 tsp white cumin seeds
    • 1 tsp pomegranate seeds
    • 1-1/4 cups water
    • 1 TBS finely chopped cilantro
    • your choice of vegetables
    • vegetable oil for frying
    Well, I thought I had besan (gram flour), which is a flour made from chickpeas/garbanzo beans; but alas, I did not. SO, I took some dried chickpeas and ground them into a powder with my blender. Only realizing afterwards that taking canned chickpeas and grinding them up would have been much easier! Oh well, NEXT TIME!

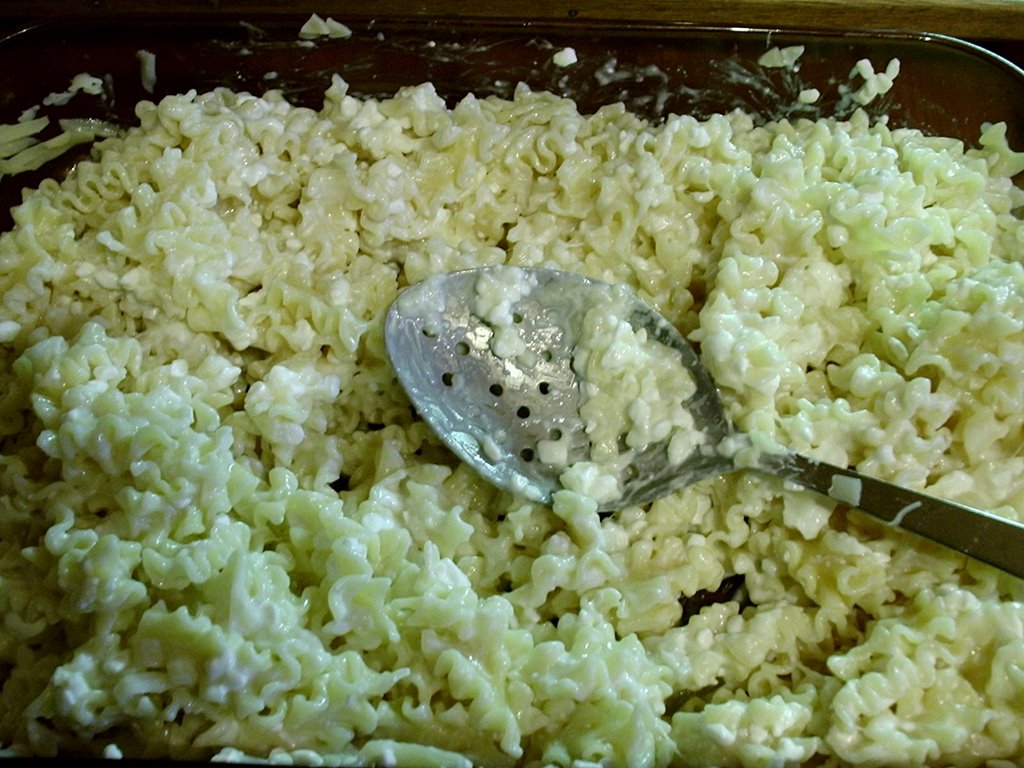
    First you add everything but the cilantro and vegetables. Using a grinding mixer (I used a hand mixer), blend until smooth. Instead of white cumin seeds, I used cheap-brand cumin and PLENTY of it! 1-1/2 tsp my ass! I used cayenne pepper for the chili. You can use any kind of chili pepper you want. Some pepper may be too distinct for this dish, but off hand none come to mind - so just use what you want. I also threw in extra gram and some regular flour because the batter was so soupy. I figured that the batter should have the consistency of onion ring batter.

    I also threw in extra pomegranate seeds. This is my first run in with a pomegranate. Interesting fruit. I will have to find more uses for it. But it is SO expensive! I figured since I had gone through so much trouble getting the sucker open and really didn't know what else I would use it for, I should throw extra seeds into this recipe. I think I used about 3-4 TBS.

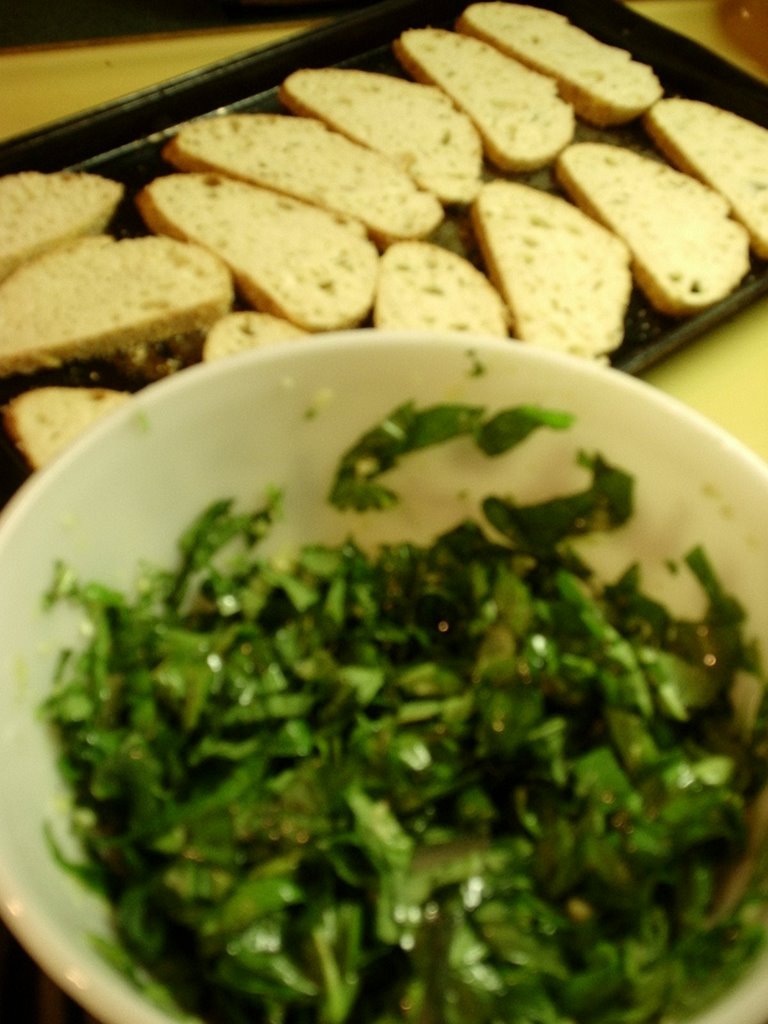
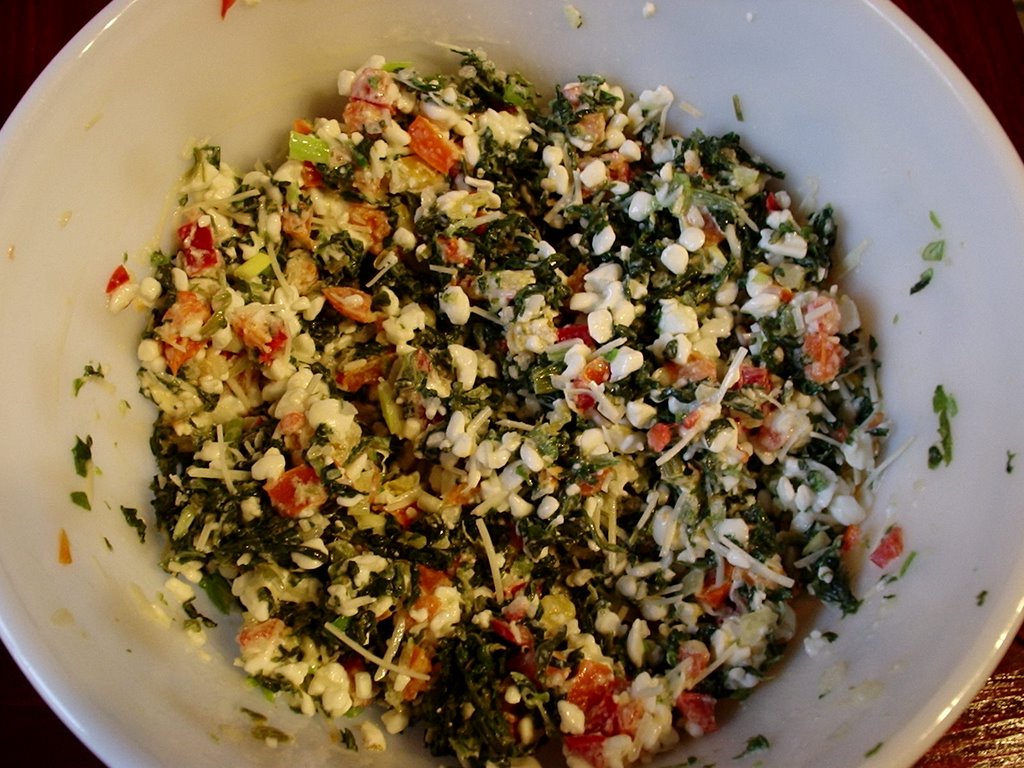
    Once the batter is the way that you would like it, mix in the chopped cilantro. Once again, I threw in extra because I LOVE cilantro!!

    Start heating a few inches of oil in a heavy pan. The pakoras should be able to float. Or if you have a deep fryer you can use that too. I used peanut oil.

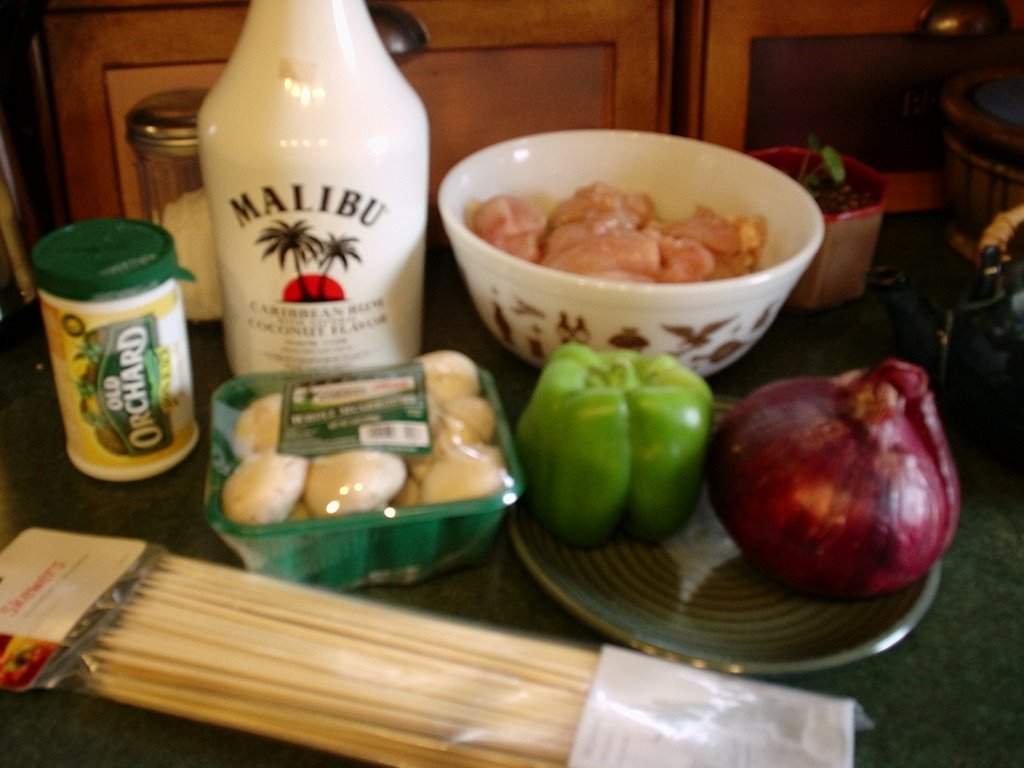
    Once the oil is hot enough to fry, mix the vegetables of your choice into the batter. I would suggest using fresh vegetables. I used frozen mixed veggies with the beans, peas, corn, Lima beans, and carrots - but we all agreed that even though the pakoras were very good, they would have been great if I had used fresh veggies.

    Cauliflower is a good one to use for this. I also chopped up potatoes and added this to the frozen mix veggies. That was really good. Just use what you like. I do have to say that this batter makes Lima beans delicious (well, probably as delicious as Lima beans can get anyway).

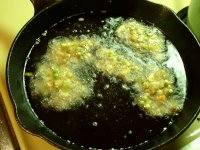
    Using a slotted spoon, spoon the veggies out of the batter and into the hot oil. Be careful the oil isn't too hot or the batter will burn and the veggies won't cook. Turn the pakoras once they appear to have browned nicely on the underside. Fry the other side until it is also deep brown.

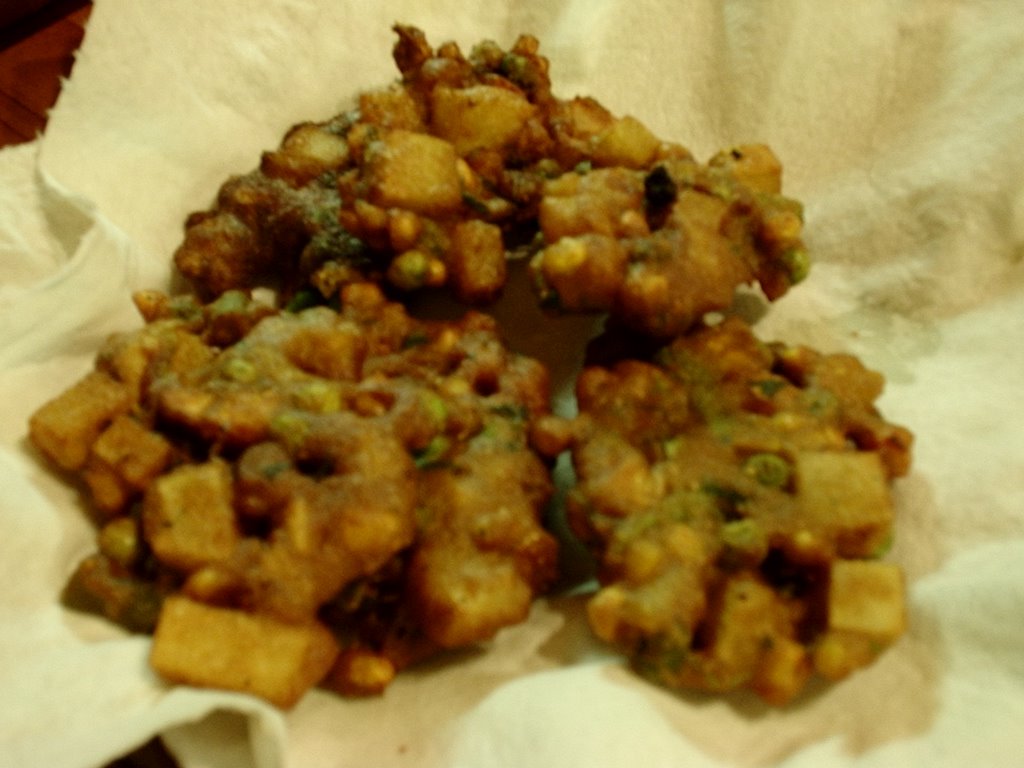
    Using another slotted spoon, take the pakoras out of the oil and place onto a plate lined with a paper towel to drain the excess oils.

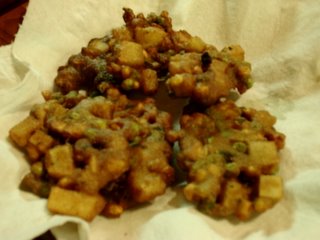
    The finished pakora pictures didn't turn out that great, but the pakoras sure were tasty!

    Serve these hot on their own or you could make a yogurt sauce for them. They are also very good reheated later.

    Thursday, January 12, 2006

    Sesame Hot Bastard Noodles

    Ah! Making these noodles was a test in patience. Not because they are so hard to make, they are actually quite easy. It was due to a series of unfortunate events. First, I spilled hot oil all over the stove and floor. It took nearly an hour to get it all cleaned up. Then I realized that I didn't have enough sesame seeds. Then, while I was toasting what little seeds I could find, I had to help my son chop the cilantro and I ended up almost burning the seeds. Then, when I put the peanut butter in the pan, it nearly burned too, even though I had the heat turned down to "warm". All while I was making the noodles I kept yelling "bastard" so my husband SSB suggested that would be a good name for them. I wasn't sure how they would turn out considering all the problems, but they were NUMMY!!

    • 1 lb spaghetti
    • 1 TBS sesame seeds
    • 1 TBS sesame oil
    • 1 TBS peanut butter, smooth or crunchy
    • 2 TBS chopped chives
    • 3 cloves minced garlic
    • 2-3 TBS soy sauce
    • 1 TBS lime juice
    • 4 TBS chopped cilantro
    • 1/16 - 1/8 tsp ground cayenne pepper
    • 1/4 cup chopped cashews
    • Salt and pepper

    Toast sesame seeds. Turn down heat. Add a tablespoon of sesame oil (or just use what you have). Throw in minced garlic. When the garlic has turned translucent, add peanut butter. Sprinkle in cayenne pepper and add chopped chives. Stir in soy sauce and lime juice.

    When everything is mixed into a nice sauce, remove from heat and add cilantro. Add the cooked, drained noodles and stir to coat them all with the sauce. Salt and pepper the whole thing. Top everything with cashew pieces and serve.

    Sunday, January 8, 2006

    Shrimp Scampi Pasta

    I love seafood, especially shellfish, and one of my favorite bug-o-the-sea is shrimp. My favorite preparation of shrimp is garlic and butter which in most of the U.S. is known as "scampi". To some in other countries "scampi" is actually the shrimp itself or a particular kind of shrimp - usually with claws like a mini lobster. (see difference below: top picture is shrimp, bottom picture is scampi)


    I got a great deal on shrimp a few weeks back with the plan of just eating them with a shrimp sauce...until I saw a Red Lobster commercial with Shrimp Scampi in it. YUMMMY!! So I set out to learn how to make the stuff myself.

    Shrimp is sold in number per pound. The less shrimp you get per pound the more expensive the shrimp. Some argue that the smaller the shrimp (the more shrimp per pound) the more flavorful the shrimp is. My shrimp was 80/100, which is small, but was perfect for pasta.

    Shrimp Scampi is just garlic, butter, a little olive oil if you like, salt and parsley. Very simple recipe. If you want to eat it just on its own, you will want to clarify the butter. I haven't figured out how to do that yet, hence the pasta.

    • 1 lb raw shrimp
    • 1 large bulb garlic
    • 1 stick butter
    • 1/8 cup parsley
    • sea salt
    • 1 lb pasta

    Heat a pan over low heat. Throw the butter in the pan and monitor the heat carefully, you want the butter to melt, not burn. Mince the garlic and throw that in with the butter.

    You can also throw in the salt at this point. I use sea salt because I like the flavor of it. It is far less harsh and much more layered than regular table salt.

    While this is melting, start a pot of water for the pasta. I just used spaghetti, because that is what I had. You could use what ever you have. You'll want to put a little olive oil and salt in the water. The salt brings out the flavor in the pasta and the oil keeps the pasta from sticking.

    Only put the pasta in once the water is boiling and keep the water boiling until the pasta is done. A huge mistake that people make when making pasta (besides picking yucky brands: I prefer Barilla brand pasta. It cooks up perfectly and has a great, fresh flavor) is that the water isn't hot enough. That, and they over cook the pasta. Pasta should be cooked until it's almost done. It will continue to cook after you take it off the heat. When the pasta is getting near done, you should periodically pull a piece out and bite into it to see where it's at. You want to take it off the heat and drain it when there is just a tiny bit of bite left in the pasta, especially for this recipe since you will be adding the pasta to the shrimp pan for the last minute or so of cooking time.

    Once the butter is melted, turn the heat to medium and throw in the shrimp. Frozen is fine, no need to thaw first.

    A huge mistake that people make when cooking seafood is over-cooking it. When the seafood is raw, it is translucent. You want to cook it until it has just turned opaque. Over-cooking seafood makes it tough. Perfectly cooked seafood should be tender.

    Once the shrimp has just turned opaque, throw in the parsley and drained pasta (assuming that the pasta is finished cooking by now - you might want to cook your pasta ahead of time to be sure that it is ready by this point in the cooking). Mix everything well and cook for another minute or so to mix the flavors.

    Serve immediately, which shouldn't be a problem because you are probably starving by now!! And believe me, this tastes even better than it looks! ::drool::

    The shrimp image was borrowed from www.scampirestaurant.com
    The scampi image was borrowed from www.chartingnature.com