
I love avocados, even if I seem to be alone in that love in my household. This recipe is one of my favorite ways to prepare them.
Showing posts with label Tomatoes. Show all posts
Showing posts with label Tomatoes. Show all posts
Tuesday, November 16, 2010


Thursday, September 3, 2009
Cherry Bomb Salsa
I have a bunch of tomatoes ripening in my garden, so I have been canning. I only can high acid foods since I don't have a pressure canner, and I never had experience with one (that may change next year). Most tomatoes are naturally high in acid, so they can be canned using the hot water bath method.
I wanted to make salsa but didn't have enough jalapeños, so I ordered a pound of Cherry Bomb peppers from our local coop. I like these peppers a lot because they have the sweetness of the ripe red sweet pepper but a nice bite of a mild jalapeño.
This makes four quart jars of salsa.
 Chop everything and put in a large pan to reduce until thickened. You can either let cool and eat it right away or you could can this for later. I did can this but had some leftovers to try. It was very good, but mild. I will add more peppers or leave the seeds in for more heat next time.
For canning:
*Please visit the National Center for Home Food Preservation site for proper canning instructions. Although no one has ever fallen ill from my canning methods, I may be omitting proper procedural steps here.*
While the salsa is boiling down, put the rack in the water-bath pan, fill 1/3 way with water, and bring to boil. Wash four jars, lids and bands. Carefully examine each jar for any damage; do not use jars with any amount of damage (you can save these for storing dry foods). Sterilize the jars and lids by placing in the boiling water for ten minutes.
 Fill the jars with the hot, reduced salsa to 1/2 inch from the top. Wipe the rim with a clean, damp towel. Place a lid on and hand-tighten a band on the jar.
 Place the jars in the water bath. When the temperature has reach at least 212degrees, place a lid on the pan and maintain temperature for 35 minutes.
 Remove the jars carefully. Place on a towel or cooling rack leaving at least an inch in between all jars. You should hear the lids contract, making a popping/pinging sound. Let them cool for 24hrs before checking for proper seal, labeling and storing in a cool, dry, dark place.
I try to use up my canned goods within a year for best taste and throw out everything that's older than three years just to be safe. But when I was growing up, we often ate home canned goods that were over five years old and we're all still alive!!
*I also found this site to be very good at basic canning instructions.*
I wanted to make salsa but didn't have enough jalapeños, so I ordered a pound of Cherry Bomb peppers from our local coop. I like these peppers a lot because they have the sweetness of the ripe red sweet pepper but a nice bite of a mild jalapeño.

This makes four quart jars of salsa.
- 1 gallon crushed tomatoes
- 1/2 lb Cherry Bomb peppers, tops and seeds removed (leave seeds for more heat)
- 1 medium sweet onion, bottom and skin removed
- 1 bulb garlic, skins removed
- 1 tsp sea salt, or more to taste
- 1/4 cup lemon juice (necessary for water-bath canning; you can omit if pressure canning)
- 2 TBS brown sugar (it cuts down on the harshness of the acidity necessary for water-bath canning these)
 Chop everything and put in a large pan to reduce until thickened. You can either let cool and eat it right away or you could can this for later. I did can this but had some leftovers to try. It was very good, but mild. I will add more peppers or leave the seeds in for more heat next time.
For canning:
*Please visit the National Center for Home Food Preservation site for proper canning instructions. Although no one has ever fallen ill from my canning methods, I may be omitting proper procedural steps here.*
While the salsa is boiling down, put the rack in the water-bath pan, fill 1/3 way with water, and bring to boil. Wash four jars, lids and bands. Carefully examine each jar for any damage; do not use jars with any amount of damage (you can save these for storing dry foods). Sterilize the jars and lids by placing in the boiling water for ten minutes.
 Fill the jars with the hot, reduced salsa to 1/2 inch from the top. Wipe the rim with a clean, damp towel. Place a lid on and hand-tighten a band on the jar.
 Place the jars in the water bath. When the temperature has reach at least 212degrees, place a lid on the pan and maintain temperature for 35 minutes.
 Remove the jars carefully. Place on a towel or cooling rack leaving at least an inch in between all jars. You should hear the lids contract, making a popping/pinging sound. Let them cool for 24hrs before checking for proper seal, labeling and storing in a cool, dry, dark place.
I try to use up my canned goods within a year for best taste and throw out everything that's older than three years just to be safe. But when I was growing up, we often ate home canned goods that were over five years old and we're all still alive!!
*I also found this site to be very good at basic canning instructions.*
Thursday, January 15, 2009
Yummus Tacos y Taquitos
As you may remember from my Yummus post, I had a large amount of it left over from the New Year Eve party. Remembering what a friend of mine had said when I had first introduced him to hummus, "Oh, it's like a bean dip!" I decided to make tacos from the remaining hummus.
The Yummus recipe was:


Bake at about 350F for about 10 minutes (5-7 minutes if using a toaster oven). If you want a more pliable taco, bake at a lower temp for less time.

I also made taquitos since I had kids in the house that day and didn't want taco toppings all over the living room while they were playing video games. I just cut the taquitos into bite sized pieces. Some have cheese in them, some don't. The kids cleaned two plates of these!

The tacos I topped with a mix of my home-made salsa, sour cream, and avocados with some romaine lettuce thrown on top.

OMG!! It was SO GOOD!! I would buy this at a restaurant.
The Yummus recipe was:
- 1/4 garbanzo bean flour
- 1 cup water
- 1 cup tahini
- 1/4 cup sesame seeds
- 1/4-1/3 cup olive oil
- 2 TBS lemon juice
- 2-3 garlic cloves
- 2 TBS lemon grass
- 1/2 tsp cayenne pepper
- 1/2 tsp paprika
- 1/2 tsp ground cumin
- 3/4 tsp sea salt
- 1/4 tsp ground pepper


Bake at about 350F for about 10 minutes (5-7 minutes if using a toaster oven). If you want a more pliable taco, bake at a lower temp for less time.

I also made taquitos since I had kids in the house that day and didn't want taco toppings all over the living room while they were playing video games. I just cut the taquitos into bite sized pieces. Some have cheese in them, some don't. The kids cleaned two plates of these!

The tacos I topped with a mix of my home-made salsa, sour cream, and avocados with some romaine lettuce thrown on top.

OMG!! It was SO GOOD!! I would buy this at a restaurant.
Thursday, January 1, 2009
Bruschetta
There was a New Year Party at my house, and I was inspired to make some very yummy appetizers. I'm going to make each recipe a new post, so watch for the others over the next few days. I'm going to start out with double tomato bruschetta.
When my son asked me what bruschetta was, the best I could come up with was "Italian salsa". I think that is a fairly good explanation. I got this recipe from AllRecipes. I read through the comments before I chose it, and ultimately made it, for ideas. Many said MORE BASIL AND LOSE THE CHEESE. The following is what I ended up with after making some slight changes:
* 6 roma tomatoes, chopped
* 1/2 cup sun-dried tomatoes softened in 1/8 cup olive oil
* 3-6 cloves minced garlic
* 2 tablespoons balsamic vinegar (I used Alessi - my favorite so far)
* 1/3-1/2 cup fresh chopped basil
* 1/4 teaspoon sea salt
* 1/4 teaspoon ground black pepper
* 1 French baguette (I use the New French Bakery Take and Bake brand - THE BEST!!)
* 1/8 cup olive oil
The original recipe calls for sun-dried tomatoes in oil, but I only keep the dried variety -- so I just took some of the oil called for in the recipe to soak my dried tomatoes. Chop them up when soft enough. Mix with the chopped Romas, basil and minced garlic. Add the two tablespoons of balsamic vinegar, sea salt and pepper.
This smells DELICIOUS freshly made, but the flavors are still pretty separate at this point. This can actually be good when you are going for dramatic, but if you want subtle, well melded flavors, let it sit overnight in the refrigerator.
The original recipe calls for the mix to be put on the cut pieces of baguette then broiled until the cheese is melted, but, I agreed with the commenters that suggested serving the mix on the side and allowing people to add their own topping -- not everyone likes the same amount of topping, plus the toast will stay toasty. SO, right before serving, cut the baguette into 1/2-1" slices, brush with olive oil and broil to toast.
Serve the mix at room temperature with the toasted baguette. I also had a dish of Romano cheese that could be sprinkled over the top.
The bruschetta was very easy and very popular. I will definitely be making this again.
One thing I might try next time is reducing (boiling down) the balsamic vinegar a little to deepen the flavor, but this was also great as is.
Another note: I brought the left overs to work on Friday (about 36 hours later) and it was even BETTER!
When my son asked me what bruschetta was, the best I could come up with was "Italian salsa". I think that is a fairly good explanation. I got this recipe from AllRecipes. I read through the comments before I chose it, and ultimately made it, for ideas. Many said MORE BASIL AND LOSE THE CHEESE. The following is what I ended up with after making some slight changes:
* 6 roma tomatoes, chopped
* 1/2 cup sun-dried tomatoes softened in 1/8 cup olive oil
* 3-6 cloves minced garlic
* 2 tablespoons balsamic vinegar (I used Alessi - my favorite so far)
* 1/3-1/2 cup fresh chopped basil
* 1/4 teaspoon sea salt
* 1/4 teaspoon ground black pepper
* 1 French baguette (I use the New French Bakery Take and Bake brand - THE BEST!!)
* 1/8 cup olive oil
The original recipe calls for sun-dried tomatoes in oil, but I only keep the dried variety -- so I just took some of the oil called for in the recipe to soak my dried tomatoes. Chop them up when soft enough. Mix with the chopped Romas, basil and minced garlic. Add the two tablespoons of balsamic vinegar, sea salt and pepper.
This smells DELICIOUS freshly made, but the flavors are still pretty separate at this point. This can actually be good when you are going for dramatic, but if you want subtle, well melded flavors, let it sit overnight in the refrigerator.
The original recipe calls for the mix to be put on the cut pieces of baguette then broiled until the cheese is melted, but, I agreed with the commenters that suggested serving the mix on the side and allowing people to add their own topping -- not everyone likes the same amount of topping, plus the toast will stay toasty. SO, right before serving, cut the baguette into 1/2-1" slices, brush with olive oil and broil to toast.
Serve the mix at room temperature with the toasted baguette. I also had a dish of Romano cheese that could be sprinkled over the top.
The bruschetta was very easy and very popular. I will definitely be making this again.
One thing I might try next time is reducing (boiling down) the balsamic vinegar a little to deepen the flavor, but this was also great as is.
Another note: I brought the left overs to work on Friday (about 36 hours later) and it was even BETTER!
Tuesday, October 31, 2006
Creamy Italian Chicken Soup

This is another of my invented recipes. Despite the name, this has no dairy in it. The creaminess comes from throwing the broth into a blender.
- 1lb boneless, skinless chicken breast, cubed
- 32oz stewed tomatoes
- 1/16 cup Italian seasoning
- 1 tsp basil
- 1 tsp oregano
- 3 cloves garlic, chopped
- 2 tsp sea salt
- dusting of cayenne pepper
- 1 sweet onion, chopped and carmelized
- 4 carrots, chopped
Put everything but the carrots in a crock pot and cook on high for about an hour.
Separate the chicken from the broth. Place the broth, chunks and all, into a blender and "liquify" for a minute or so until smooth.
Throw everything back into the crock pot with carrots.
Let this cook on low for another few hours.
When we got home and were hungry cause it smelled SOOO GOOD!! Although the picture doesn't show it, I did cook up some egg noodles to add shortly before serving. This soup was a big hit with my family. My son ate almost all of it!
Thursday, March 30, 2006
Northern Pike in a Caper Sauce
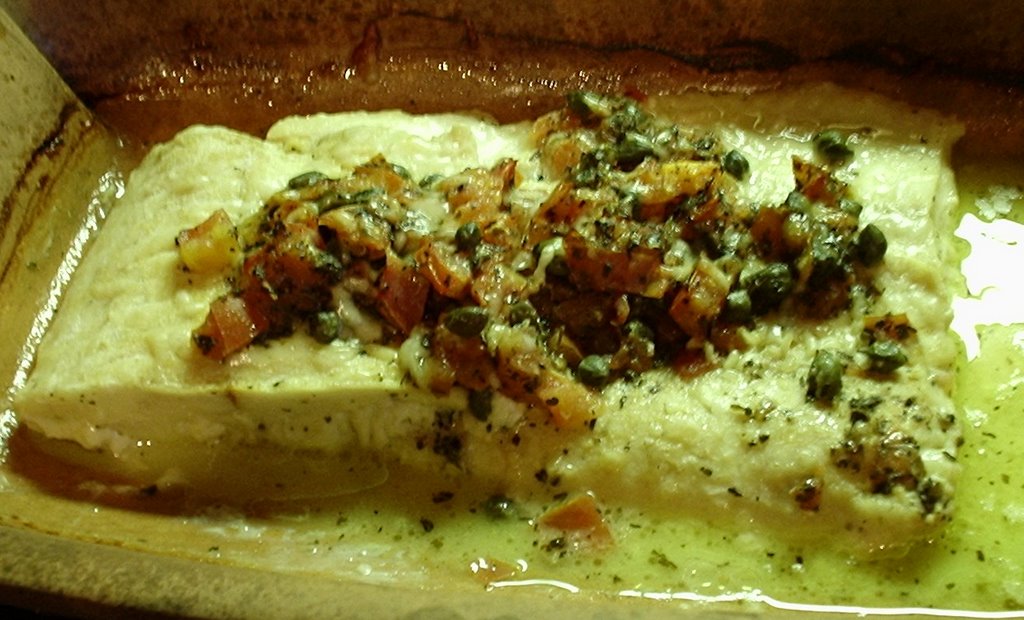 I got some northern pike on sale last week and wanted something quick for dinner tonight, so pike it was.
Northern pike is a fairly common, mild-flavored, predator fish from where I grew up. It has a loose skeletal structure which makes it very difficult to get completely bone-free. But this was professionally filleted, so I was good to go.
I actually took the recipe from the package the fish came in (but of course I made a few changes). It had capers in it and I had bought a jar of capers months ago, but didn't have any recipes to use them in. Mmmm... capers!!!
- 2 cloves garlic
- 2 TBS olive oil
- 1 small tomato
- 1-2 TBS butter
- 1-2 TBS wine or sherry
- 2 TBS basil
- 2 TBS lemon juice
- 3 TBS capers
- 2 TBS Italian four cheese mix
- salt & pepper
Mince garlic and saute in olive oil. Chop up tomato and throw in the pan with the garlic. Throw wine (I actually used sherry), basil, capers and butter. Cook until the butter is melted. Salt and pepper to taste.
I used my clay pot cooker for the fish. It works great for fish too! I put a little olive oil in the bottom of the pot, But I don't think this was necessary. I put the fish fillets in frozen and poured the lemon juice and the caper sauce over the top. I sprinkled on the Italian four cheese mix and baked this for 20 minutes at 500F.
It was DELICIOUS!!!! This is going on my favorites list. And now I have a recipe to use up those capers on. Mmmm... capers!!
Saturday, August 27, 2005
Easy Veggie Lasagna
Lasagna was always one of the three dishes that my mother made that were not only edible, but were the best I ever tasted. I hardly ever make it because it seems so difficult. As I was thinking of possible zucchini recipes though, I thought that lasagna would be a perfect try.
Heat a pan with some olive oil, one or two tablespoons. Chop up a couple cloves of garlic. Add to the hot pan- you do not want the pan so hot that the garlic turns brown, just enough to cook it. Dice six or so tomatoes. Add those to the pan. Add three or four tablespoons of Italian seasoning and a good sprinkling of garlic salt (or other salt. Sea salt? You know how much I like sea salt, mmmm...).
As the sauce cooks down, slice up a medium size zucchini into 1/8-1/4 inch slices. If you like mushrooms you can slice some (I used portabella since I had some leftover). Remove the noodles from the heat even if they are not cooked all the way (in fact you probably only want them cooked halfway). Rinse them under cold water and separate.
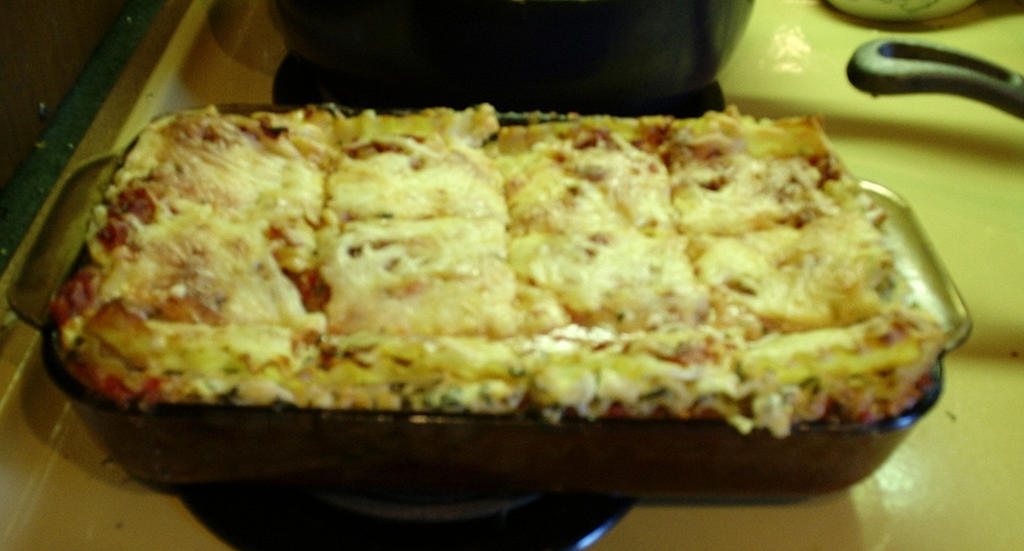
When the sauce is thick, spread some of it in an oiled cake or lasagna pan. Put in a layer of noodles, then a layer of cheese mix, then noodles, then a layer of the raw zucchini slices and the mushrooms (if you are using them) topped with tomato sauce, another layer of noodles, the rest of the cheese mix, a layer of noodles, and top with the remainder of the tomato sauce. Top the whole thing with grated mozarella.
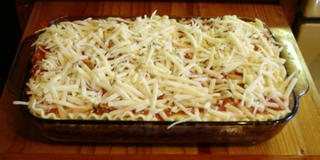
Bake in the oven for about an hour. My husband is not a big vegetable fan, but he liked this. He even ate leftovers- that's rare. I made mine half with mushrooms and half without (my husband doesn't like mushrooms). My son ate until the mushroom side was completely gone.

- 10 lasagna noodles
- 12 oz cottage cheese
- 7 oz ricotta
- handful Parmesan cheese
- handfull Romano cheese
- 3-5 oz spinach, fresh or frozen
- 2 eggs
- 2-4 cloves garlic
- 6 tomatoes
- 3-4 TBS Italian seasoning
- 2 cup sliced mushrooms
- 8-10 oz shredded mozzarella
- 1 med zucchini
- Salt - garlic or sea salt
Heat a pan with some olive oil, one or two tablespoons. Chop up a couple cloves of garlic. Add to the hot pan- you do not want the pan so hot that the garlic turns brown, just enough to cook it. Dice six or so tomatoes. Add those to the pan. Add three or four tablespoons of Italian seasoning and a good sprinkling of garlic salt (or other salt. Sea salt? You know how much I like sea salt, mmmm...).
As the sauce cooks down, slice up a medium size zucchini into 1/8-1/4 inch slices. If you like mushrooms you can slice some (I used portabella since I had some leftover). Remove the noodles from the heat even if they are not cooked all the way (in fact you probably only want them cooked halfway). Rinse them under cold water and separate.
When the sauce is thick, spread some of it in an oiled cake or lasagna pan. Put in a layer of noodles, then a layer of cheese mix, then noodles, then a layer of the raw zucchini slices and the mushrooms (if you are using them) topped with tomato sauce, another layer of noodles, the rest of the cheese mix, a layer of noodles, and top with the remainder of the tomato sauce. Top the whole thing with grated mozarella.

Bake in the oven for about an hour. My husband is not a big vegetable fan, but he liked this. He even ate leftovers- that's rare. I made mine half with mushrooms and half without (my husband doesn't like mushrooms). My son ate until the mushroom side was completely gone.
Friday, August 26, 2005
Rosemary Basil Chicken with Spaghetti
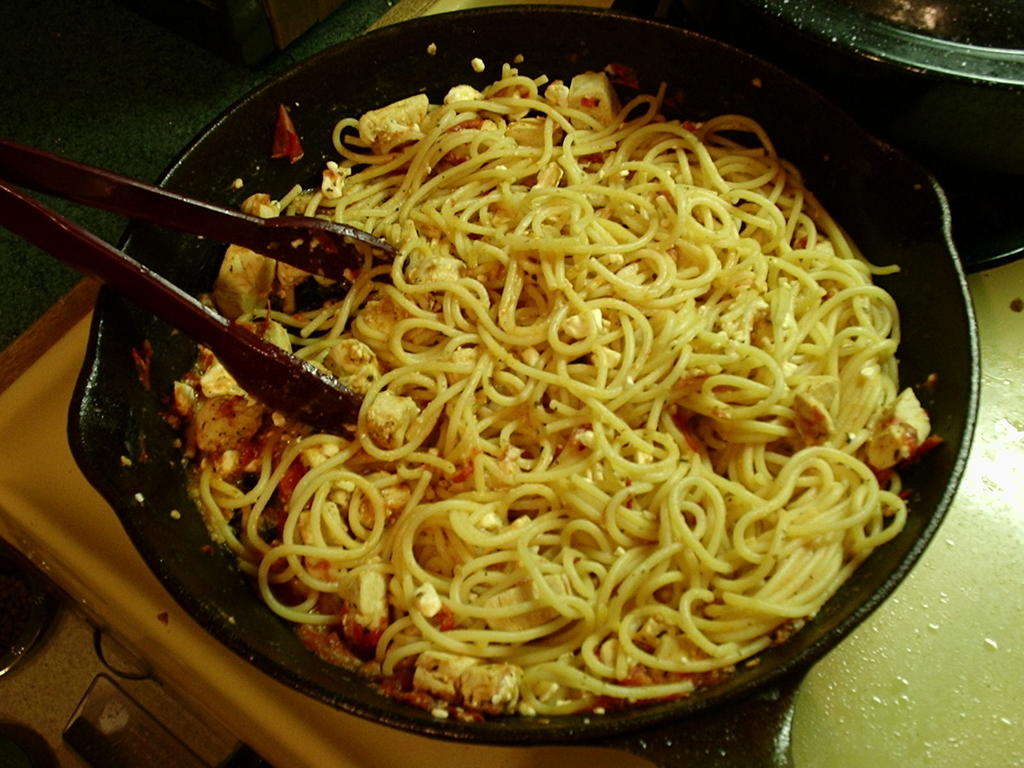 This is one of my very own recipes that I made when I needed something quick for dinner. Fast and yummy chicken pasta.
- 1lb boneless, skinless chicken breast
- 1 lb pasta
- 2 cloves garlic
- 3-5 medium tomatoes
- rosemary, fresh or dried
- feta (optional)
- basil, fresh or dried
- olive oil
- sea salt
While I was defrosting my frozen chicken(about two minutes on defrost in the microwave), I started a pan of water for the pasta. I chose spaghetti because we had just bought some. You could use any plain pasta. I always put salt and oil in the water. They help heat the water faster, season the pasta, and they help keep the noodles from sticking to each other.
I heated up another pan, my cast iron fry pan, of course. Once it was hot, I put in about two tablesoons of extra virgin olive oil (cause you only live once) . While that was heating up I chopped up the still mostly frozen chicken into one inch cubes. You can chop them up however you like. I made sure that the pan was good and hot before throwing in the chicken. This sears the outside to keep the juices inside, plus it makes it taste better. Start stirring right away to make sure that no side gets over-cooked and all sides get seared fairly evenly.
Once the chicken cubes are fully seared, turn down the heat to about medium. Make sure that there is still moisture in the pan to keep the chicken from getting dry. Add a little water if you have to. Mince two cloves of garlic and add to the chicken. Grind up half a tablespoon of rosemary and throw that in. Add about a tablespoon of basil- or more if you like. Add a couple of big pinches of sea salt (or regular salt, or garlic salt, whatever). I like sea salt because regular table salt is too harsh for my tastes, and sea salt gives the food a nice flavor.
The pasta water should be ready by now. Add the pasta, stir, reduce the heat slightly, and cover.
Dice up the tomatoes into thick chunks. Throw them into the chicken pan. I never peel tomatoes. Peeled tomatoes are for wusses. The tomato peels add a nice bright red garnish to the dish. Cook the mix down until the tomatoes make a pseudo sauce. Add a little black pepper if you like. I did.
The pasta should be done, or at least when it is done, drain and add to chicken mix. OR you can do it the lazy Sylvana way- just tong the pasta out of the pan you cooked it in right into the chicken mix pan. What's a little pasta water among friends, eh? Stir the whole thing together. For added zip, add a couple handfuls of feta cheese (good stuff, that feta). And serve.
Subscribe to:
Posts (Atom)